Saturday, September 29, 2018

Personalized Holiday Note Cards with Scrapbook.com's Rustic Holiday Wreaths and Sentiment Stamps


Gift-giving season is coming!  I LOVE giving handmade personalized gifts.  I find in this day and age, people are just so surprised to receive something handmade just for them that I enjoy every moment of making something with a special person in mind.

When Scrapbook.com asked me if I would like to create something with its new line of Exclusive Clear Acrylic Designer Stamps, I was thrilled to receive their Rustic Holiday Wreaths set.  All of Scrapbook.com's new exclusive stamps are a premium clear photopolymer and were a collaborative team effort of stampers and paper crafters' hand-drawn designs from Scrapbook.com's own home state of Arizona.  The charming images in the Rustic Holiday Wreaths set were right up my alley.  I love their sweet and simple charm; they are beautiful (and easy!) to color and lend themselves perfectly to adding little details that make the finished cards so special.


I first decided to make a set of personalized notecards for a friend.  I formatted a quick "L" on my computer, printing it out on a laser printer.  I then sent it through my Heidi Swapp Minc Machine with some gold foil.  I stamped the wreath image around the initial using Scrapbook.com's Hybrid Black Ink and colored it in with Tombow Markers.  Then the real fun began... the embellishing!  I used my stackable sponge daubers to add a glow around the little stars with Rubber Ducky ink.    I LOVE to add hand stitching to my projects, so I added little french knots for the berries, and stitched on some gold sequins.  I cut the image out with a stitched square die and stitched around the edge, using the die cut stitch lines as holes.  I then mounted it on top of a square notecard with a band of gold paper underneath.


I just loved the way this little notecard turned out, so I continued on using different wreath images.  On this next notecard, I foiled the "L" in green foil, stitched over some of the leaf images with green thread and added some fuchsia-colored sequins.  I gave the little stars a glow and some sparkle using a Tonic Aqua Shimmer Pen and topped the berries off with some Tonic Nuvo Crystal Glaze.  I mounted the panel on top of a square of gold foil cardstock.


For another notecard I used the same techniques, using hand stitching, some ink blending using Caribbean ink and a jumbo sponge dauber, sequins and Tonic Crystal Glaze to add special details all around the wreath.  


Hint... it is super easy to make coordinating envelopes for these little square notecards with an Envelope Punch Board!  And wouldn't these little cards make the greatest place cards for a beautiful holiday table?  

I also wanted to create some holiday cards I could give away, so I made another card using a wreath and a stamped sentiment from the Holly Jolly Sentiments set.  I stitched around the edges of the image and the base panel with gold thread and added a band of gold paper.  


You can probably tell that I'm having a ton of fun with these stamp sets!  Scrapbook.com has so many fantastic holiday sets.  The sentiment stamps are phenomenal and include so many beautiful, versatile sayings. 


I can't wait to get started on more personalized notecard sets for friends and teachers... they are such quick and easy projects but pack so much punch with the little details you can add.

I hope you enjoyed these projects!  Links to the products mentioned here are below.  I participate in the Scrapbook.com affiliate program, which means that I receive a small commission at no cost to you when products are purchased through the links I share.  Thank you so much for your support!


SaveSaveSaveSave
Wednesday, September 26, 2018

Altenew Refresh Your Alcohol Markers Blog Hop Winner!


Thank you to everyone who stopped by for Altenew's Refresh Your Alcohol Markers blog hop!  I appreciated each and every comment and I'm so thrilled you all stopped by.  Using a random number generator, the winner of the $20 Altenew gift card is:


Congratulations, AnnieD!  Please contact Altenew at winner@altenew.com by 9/30/2018 with the subject line Altenew Refresh Your Alcohol Markers Release Blog Hop Winner from Leigh Houston's Stitches in Paper Blog.

I hope to see you all again for the next release soon! Have a GREAT day!!! xoxo

A Review of Scrapbook.com's Premium Hybrid Inks


Hello, inky friends!  I am thrilled to be posting today with a review of Scrapbook.com's new line of exclusive Premium Hybrid Ink pads.  I was SO excited when Scrapbook.com asked me if I'd like to create some projects with these new inks, but I have to admit that I was a little nervous.  Unless you're new to stamping, you have undoubtedly come across some real doozies in the ink pad world.   I've seen splotchy and blotchy (you know what I'm talking about), colors that fade, dull and lifeless hues... I was a little apprehensive about trying another new line.

Well, I'm thrilled to report that these hybrid inks are absolutely fantastic.  They combine the best properties of both dye and pigment inks, stamping in vibrant color that dries quickly.  The colors are gorgeous and they stamp beautifully; they are completely on par with my other favorite inks.  I started by stamping out swatches of each ink and I just loved the results.  I also LOVE the color numbering program.  There are twelve different color groupings of ink including pink, rose, orange, yellow, sky, cyan, blue, green, violet, gray, wood, and tan, and within each of these groups are 3-4 different shades (all numbered for easy reference), making stamp layering a breeze. There is also Cardinal Red (my FAVORITE red ink of all time), Pine, black dye ink, black hybrid ink, and white pigment ink for a total of 51 ink pads in the line.

Some of you might know that I shy away from ink blending.  I typically really don't enjoy it because, well... I am BAD at it.  Like colossally bad.  So what better time time to try my hand with ink blending than with some new inks?  Scrapbook.com was generous enough to send me some stackable ink daubers, jumbo ink daubers, and stencil brushes to try so I got to work.  And within minutes, I was an ink blending fool.  LOL  These inks and tools make it SO easy to blend.  And let me tell you... if I can do it, ANYONE can do it.  You just need the right tools!

To practice, I stamped out some background panels using Versamark ink and white embossing.  I then started experimenting with the inks, first using the stencil brushes.  This panel came together in minutes, with no special cardstock needed.  The inks blended like a dream.  I just love the soft look you achieve using the stencil brushes!


I decided to try my hand with the ink daubers next.  And let me tell you... the jumbo ink daubers are my new best friend.  I LOVE them.  No more card-ruining foam blending sponges for me.  The daubers blended the inks like butter.  Just for fun, I blended out a panel of rainbow hues first using the stencil brushes, then using the jumbo daubers and stackable daubers to intensify the color.  I've never had such an easy time ink blending before with NO smudges!


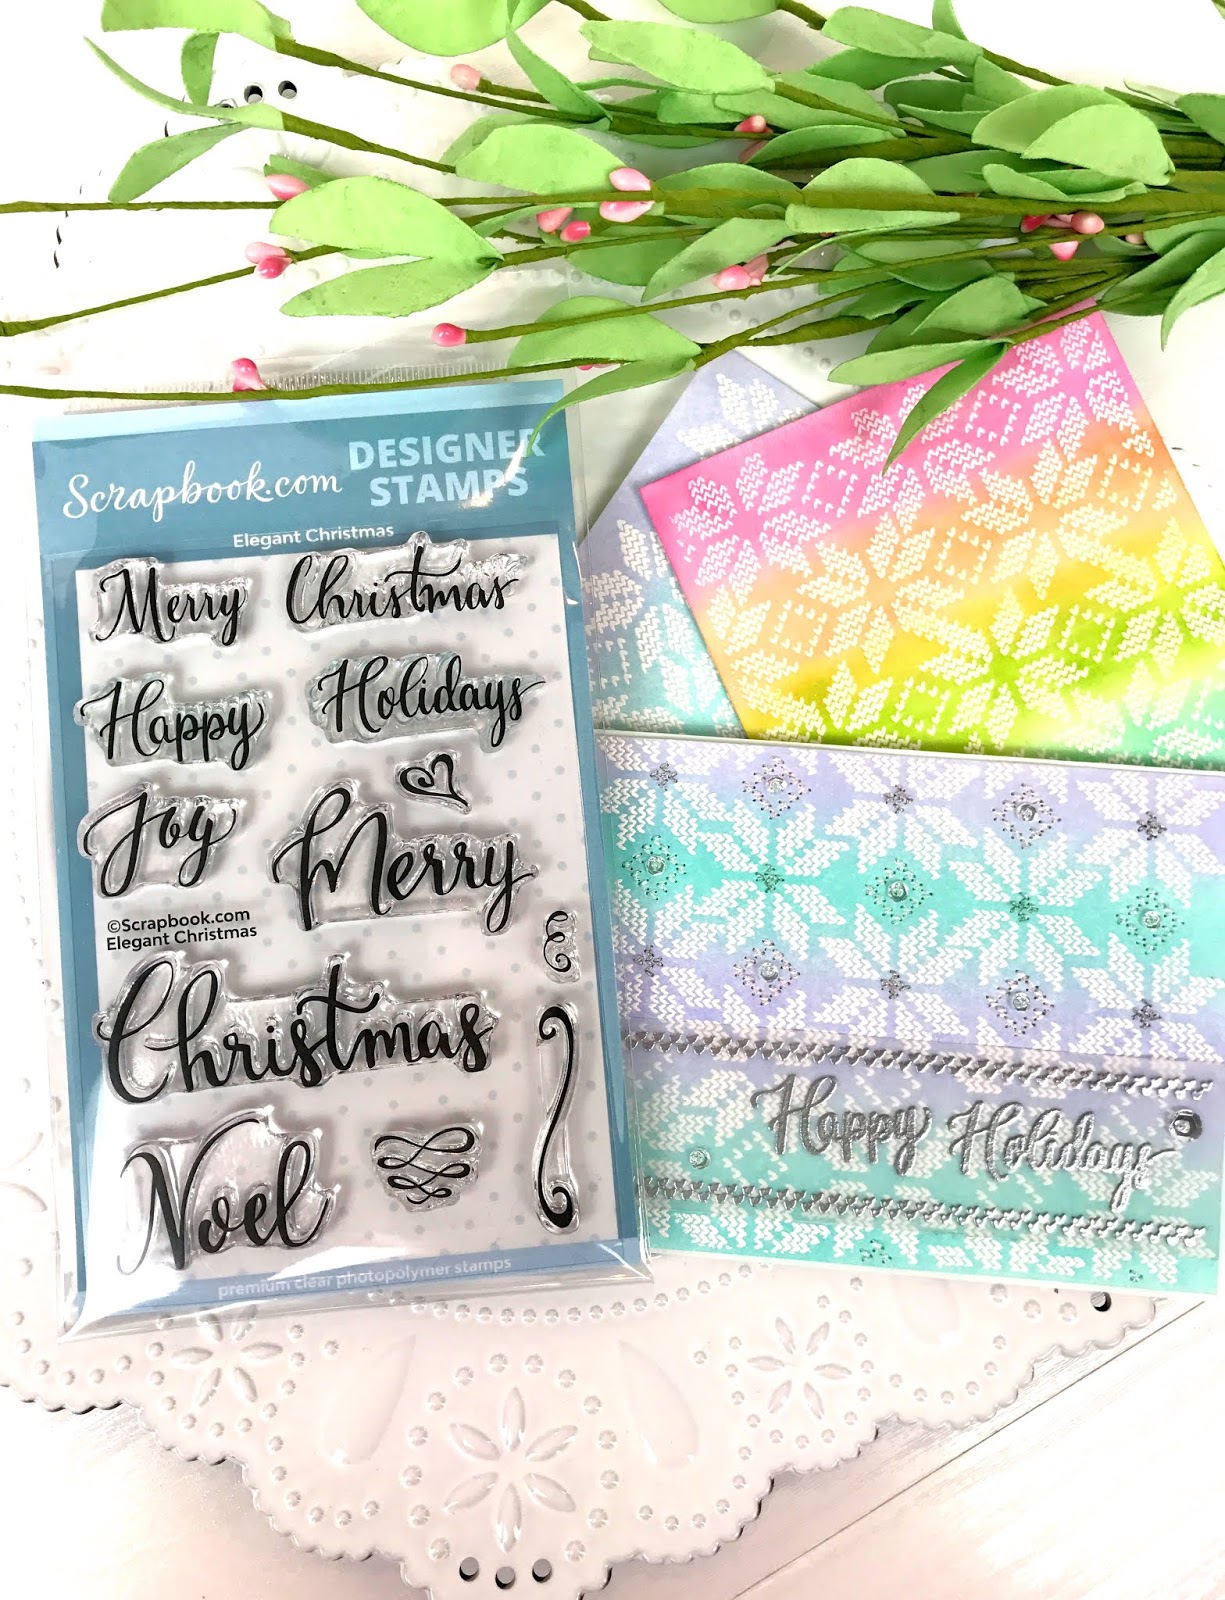
I was having so much fun that I ink blended another panel using Caribbean and Soft Lavender inks and created a card using Scrapbook.com's Elegant Christmas stamp set with silver embossing powder on vellum... I didn't want to cover up all that gorgeous ink blending.


You can probably tell that I love the entire line of Scrapbook.com's inks, but if you're looking to start out with a few, here are my favorites:

Cardinal Red: the most beautiful true red in my entire ink collection.  Absolutely gorgeous.

Caribbean: the PERFECT aqua for that subtle pool-colored ink blending.  I already have the re-inker on order.... this is the aqua shade I've been looking for!

Mixed Berry: a beautiful fuchsia-colored berry shade.

Rubber Ducky: a perfect shade of sunshiny yellow.

Succulent: a pretty fern-colored green.

All of the "Wood" shades... I was seriously lacking in some layering brown hues!

I hope this review is helpful to those considering trying out these new inks.  I would not hesitate to add them to any collection of scrapbooking or card making supplies.  If you have any questions, please feel free to leave me a comment below and I'd be more than happy to help!  I'll be back shortly with some more holiday projects using these inks and Scrapbook.com's new Exclusive Clear Acrylic Designer Stamps!

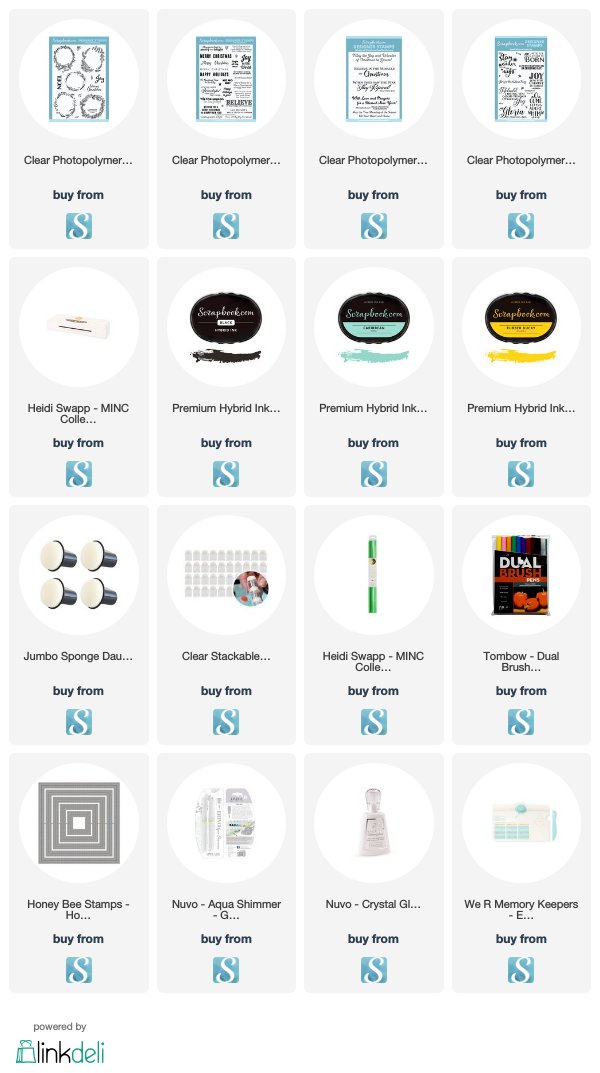
Links to the products mentioned here are below.  I participate in the Scrapbook.com affiliate program, which means that I receive a small commission at no cost to you when products are purchased through the links I share.  Thank you so much for your support!


Tuesday, September 25, 2018

A Trio of Birthday Cards with My Favorite Things

Hello everyone!  I am thrilled to be back with some new projects featuring products from MFT’s September release.  Despite being a cardmaker, I am always finding myself with a shortage of birthday cards when I need them (I hate having to run out and buy a birthday card when I have a ton of finished cards sitting in my stash!)  I was so inspired by the Bundle of Balloons stamps and Die-Namics that I ended up creating a trio of birthday cards, which made both me and my dwindling birthday card stash very happy!  


I recently came across an image of a hedgehog wearing a birthday hat on Instagram, and it has now become a firm belief of mine that hedgehogs should wear party hats at all times.  LOL  So for my first card, I created a birthday parade of little hedgehogs from the new Woodland Friends stamp set.  After stamping the hedgies in light ink, I colored them with Copic markers for a no-line coloring look and masked them off.  I hand-drew a wavy line to delineate the ground on stamp masking paper, using this to ink blend grass using Twisted Citron and Mowed Lawn Distress Oxide Inks.  After it was dry, I masked off the ground and created additional masks using my Stitched Cloud Die-Namics and balloons from the Bundle of Balloons Die-Namics for the sky.  I ink blended the sky using Tumbled Glass Distress Oxide Ink, removed the masks, and used the negative balloon masks to ink blend the balloons with Picked Raspberry, Carved Pumpkin, Mustard Seed, Tumbled Glass and Shaded Lilac Distress Inks.  I stamped the “Happy Birthday” sentiment from the Birdie Brown Greetings Galore stamp set and embossed it in gold.  

After the ink blending and stamping was done, all there wa left to do was to give the hedgies their little party hats!  I cut little cone shapes out of my MFT Plaid Patterns paper pack, giving them each a little plaid hat topped with a pom pom.  I added gold stitching around the hats to give them a little extra pop, stitched around the edge of the panel I cut using my Stitched Rectangle Die-Namics, and the card was done! 


I was still on a party hat kick, so I decided to create a second card using all of the Woodland Friends critters. 


After stamping the animals out and coloring them with Copics, I die cut them with the coordinating Woodland Friends Die-Namics and gave them party hats made with the same Plaid Patterns paper. I cut out grass with a die from the Stitched Scallop Basic Edges 2 Die-Namics set and ink blended it using the same technique as the first card, adding some green stitching along the stitch lines. I used Tumbled Glass Distress Oxide Ink and the MFT Cloud Stencil to create a sky. I die cut the balloons from the Bundle of Balloons Die-Namics and the word “happy” from the Birthday Boy and Girl Die-Namics (I used the word “Birthday,” altering the letter “r” to make a “p”). I stamped the word “Birthday” from the Birdie Brown Greetings Galore set on the grass to finish the sentiment. All that was left to do was assemble my scene, adding some silver thread for the balloon cords. I love this little forest-y party!


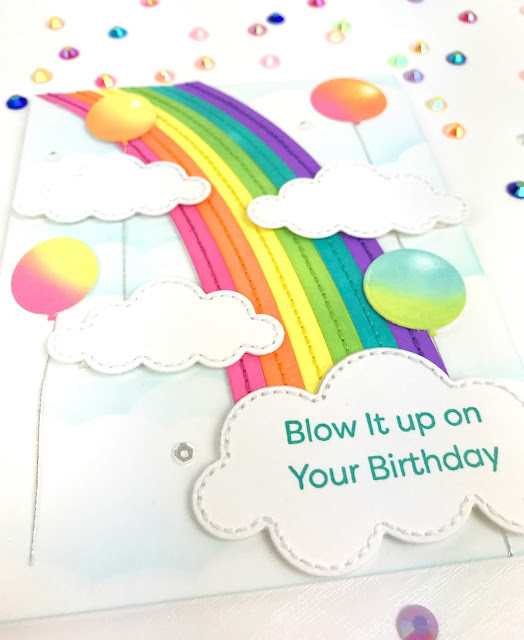
The last card was inspired by the fabulous Stephanie Klauck, who has one of my favorite, rainbow-iest Instagram profiles ever. This card came together so beautifully using the Bundle of Balloons Die-Namics (again, ink blended with Distress Oxide Inks) and the End of the Rainbow Die-Namics.


After ink blending a sky with the Cloud Stencil and Tumbled Glass Distress Oxide Ink, I ink blended the rainbow stripes with more Oxide Inks and stitched them using coordinating thread. I also stitched the outlines of the clouds with white thread and stamped the sentiment on the largest cloud. I then assembled my scene, again adding silver thread as balloon cords and Pretty Pink Posh sparkling clear sequins.


I hope you enjoyed these birthday cards! I’ll see you later in the month with some ideas for using the new Scallop Cross Stitch Bookmark Die-Namics!
SaveSaveSaveSave
Thursday, September 20, 2018

Altenew Refresh Your Alcohol Markers Blog Hop + Giveaway!


Hello fellow Altenew fans!  Welcome to this stop of the Altenew Refresh Your Alcohol Markers Blog Hop!  If you're hopping along with us, you might be visiting me from Kymona Tracey's blog.  If you're jumping in here, you can start back at the Altenew Card Blog blog for all the details.  I also have the entire blog hop list at the end of this post in case you've missed anyone.

Altenew has released refills for its beautiful line of alcohol markers!  The refills come in beautiful, sturdy bottles in all the gorgeous marker shades.  This is obviously great for refreshing your markers (if you use them as often as I do, this is wonderful news), but it's extra exciting because we can now use these beautiful colors for alcohol ink techniques.  I've been wanting to expand my alcohol ink horizons for quite a while, so I decided to focus on using these techniques with my refills for my cards today.

When making my alcohol ink panels, I found that I occasionally made a panel that I was entirely happy with.  More often, there would be a splotch or section that I wasn't as thrilled with as the rest of the panel.  So I thought it would be helpful to split this blog post into two parts: how I used alcohol ink panels in their entirety and what I did when I liked only a portion of my panel.

My first cards use whole alcohol ink panels.  I played around with my marker refills by using them both in their concentrated form and by diluting them with 90% isopropyl alcohol.  My technique was simple... just drop the inks onto Yupo paper and blow them around with a straw.  The results were so beautiful, and you can see the difference between the diluted and concentrated inks.


I really loved the panel I created on top, so I decided to make it the focus of a card.  Not wanting to take away from the beauty of the inks, I die cut the word "Sweet" from Altenew Script Words 3 Die set  gold glitter cardstock and adhered it in the middle of the panel.  I heat embossed the "Hello" and "Thank you for being amazing" sentiments from the Amazing You Stamp Set.  One tip... when embossing on Yupo paper, make sure your heat gun is REALLY hot (like you've warmed it up for 10 minutes hot).  And don't point the gun on one section of the paper for too long or your paper will warp.  I swirled the gun over my panel, lifting it off the paper every couple of seconds to avoid melting or warping.


Some gold stitching and gold sequins and this card was finished.  I love how the panel really shines on this card!

For my second card, I used the same technique of diluting my refills with isopropyl alcohol.  I then painted them onto a Yupo paper panel with an inexpensive paint brush so I could concentrate the colors where I wanted them, dabbing ink here and there and blending them together with the brush.  I loved the soft effects that I achieved, so I decided to heat emboss flowers in white over the panel so not to take away from the inks' beauty.  I used flowers from the Botanical Garden Stamp Set to achieve this look.  To add some additional interest, I colored over the leaves with my Frayed Leaf artist marker.  I embossed my "just because" sentiment from the Painted Greetings Stamp Set on vellum so the background could show through, and added gold stitching and sequins to finish.  


More often than not, I would create a panel where I'd be unhappy with a splotch or section that just wasn't as nice as the rest.  For these panels, I decided to die cut shapes to showcase the beautiful inky backgrounds. Flowers and alcohol inks are just a gorgeous pair!  

For my first card, I decided to heat emboss flowers from the Botanical Garden Stamp Set onto a panel I had created with Frosty Pink and Ruby Red refills.  I layered these flowers onto a panel I stamped with additional flowers and sprigs from the same stamp set.  To make the leaves green, I colored over the alcohol inks with my Frayed Leaf and Forest Glades markers.  This was such a fun technique (I made sure to scribble off my green markers onto scrap paper to avoid any staining of the nib).  I cut the "Hello" from Blooming Bouquet Die Set from the same pink and coral panel and embossed the "so thankful for you" sentiment from the Needlework Motif Stamp Set.  


For my next card, I decided to use my Fantasy Floral 3D Die Set to layer alcohol ink die cuts to make a gorgeous rose.  I cut the Thinking of You die sentiment from the same pink and red panel, and cut the leaves from the green and aqua panel shown above.  To make the background panel, I used diluted Sea Glass refill ink and blew it over Yupo paper with a straw.  


For my last card, I die cut the word "hello" from a few different panels I had created.  I watercolored a background using my Altenew Watercolor Pan Set in shades of aqua.  My "Stay Awesome" sentiment is from the Needlework Motif Stamp Set.  I stitched around the edge of the panel and the words with silver thread.  


I clearly had a lot of fun making cards with my Artist Marker Refills!  LOL  These techniques are so fun and I just love the results you can achieve!  

To celebrate this blog hop, Altenew is running a 15% off marker promotion! Save 15% Off on All Artist Markers from 9/20/2018 at 12:01 EDT until 9/22/2018 at 11:59 PM EDT. No code needed to enjoy this sale! Not valid on previous purchases. Shop HERE→ https://altenew.com/collections/artist-markers (excluding the refills and brush nibs)

PRIZES!!! 

To celebrate this release, you have a chance to win a $20 gift certificate right here!  Just leave me a  comment below and I'll choose one lucky winner by September 26, 2018!  Good luck!!!

Altenew is also giving away a $30 gift certificate to six lucky winners!  Please leave a comment on the Altenew Card Blog and/or Altenew Scrapbook Blog for a chance to win.  The six winners will be announced on the Altenew blogs on September 29, 2018.

Thanks so much for visiting my blog!  Next stop on the blog hop is the lovely and talented Virginia Lu.  I can't wait to see what she creates!  Enjoy the blog hop and have a WONDERFUL day!!! 

The blog hop order is:


Links to the supplies I used are below.  I participate in the Altenew affiliate program, which means that I receive a small commission at no additional cost to you when products are purchased through the links I share.  Thank you for your support!


SaveSaveSaveSaveSaveSaveSaveSaveSaveSaveSaveSaveSaveSave
SaveSaveSaveSave
Friday, September 14, 2018

Spellbinders Blog Hop: Holiday Die Release


Hello and welcome to my stop on the Spellbinders blog hop!  I am so excited that you're here... Spellbinders has released so many great new holiday products and I had so much fun creating my projects.  You might have arrived from the amazing Nichol Spohr's blog, but if you're jumping in here and would like to start from the beginning, you can find the Spellbinders blog here.  I will also have the blog hop list at the end of this post.


I was so excited to be able to create a bunch of fun projects with the new Spellbinders Holiday Die D-Lites.  I started with the new Santa Etched Dies.  Isn't he adorable?  I started by making a card, simply die cutting the pieces, coloring them with Copic Markers, and assembling them.  I beaded a border from my Spellbinders Pierced Rectangle Dies and accentuated it with a little flower I created from Spellbinders Shapeabilities Layered Poinsettia Etched Dies, and used this to frame my Santa to complete my card.

I didn't want to stop there, though.  As a child, my absolute favorite ornaments were Wizard of Oz ornaments my mom had hand stitched from felt.  This die was perfect to re-create that look.  I simply cut the Santa from wool felt and added some simple hand-stitched details (I used gouache paint to paint on his eyes and eyebrows).  I assembled the pieces using felt glue and added a hanger.  What a sweet little ornament!  I think this would be perfect for a teacher gift along with the coordinating Santa card and a gift card!


For my next projects, I used the Christmas Tree Etched Dies to create a shaker card.  I simply cut out multiple die cuts and stacked them on each other, creating three little wells that I filled with colorful sequins.  I layered this tree onto a fun patterned paper and stitched another border with the Pierced Rectangle Dies.

I also created a coordinating wool felt ornament from these tree dies.  I cut the tree shapes from green wool felt and glued them together using Felt Glue.  After cutting the tree trunk from brown wool felt and adding some stitched details, I had so much fun hand beading the tree using sequins and clear seed beads.  I assembled the pieces together with felt glue and added a hanger.  I just love this sparkly little tree ornament!


For my last project, I decided to make gift tags.  I am always looking for pretty tags to adorn my holiday gifts, and these came together so quickly.  I aded double-sided adhesive to glitter paper before die cutting snowflakes from the new Die D-Lites Etched Snowflakes Dies.  I then simply adhered the snowflakes to a tag I cut out from acetate, aligning matching snowflakes on both sides of the acetate so the adhesive backing wouldn't show through.  I then attached a vellum "to and from" strip to each tag.  I love this fun clear look - it is perfect to decorate holiday gifts without taking away from pretty wrapping paper.


GIVEAWAY!!!

I hope you enjoyed these projects!  To celebrate this release, Spellbinders is giving away a $50 to one blog reader select from the comments across the blogs in this hop.  Giveaway closes on Sunday, September 23rd at 11:59 pm EDT.  The winner will be announced in the blog hop post the following Monday.  Winner is responsible for shipping cost, duties and taxes.  Good luck!

Thank you so much for joining me today!  I had so much fun with these projects.  The next stop on the blog hop is the amazingly talented Keeway Tsao.  The entire blog hop is as follows:


Links to the products I used are below.  I participate in the Spellbinders affiliate program, which means that I receive a small commission at no additional cost to you when products are purchased through the links I share.  Thank you for your support!  I'd love to see any projects you make with these products - be sure to come back and show me!  I hope you have a wonderful day and enjoy the hop!


Custom Post Signature

Custom Post Signature