Friday, May 7, 2021

Spellbinders Birdhouses Through the Seasons


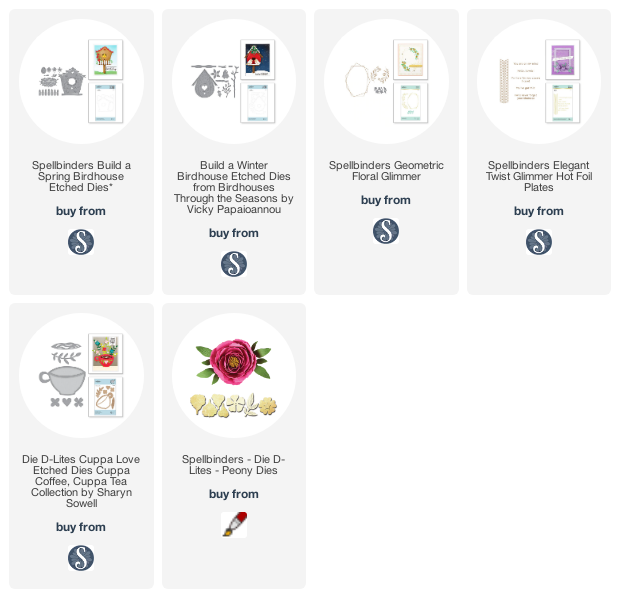
Hello, crafty friends!  I am thrilled to be here today with this die cut card featuring Spellbinders's gorgeous new Birdhouses Through the Seasons dies.  These beautiful dies made putting this card together so easy and fun! 


I chose to make my card in shades of blue with pops of pink.  For my birdhouse, I started with the Fall set, diecutting the house from a cornflower blue cardstock.  I embossed the image using my Spellbinders Platinum diecutting machine and the included embossing mat to make sure the card highlighted all the beautiful texture of the die.  I added some quick handstitching along the vines to make them pop.  I then diecut a bunch of florals and foliage using the Fall and Winter birdhouse sets, along with some of my other favorite Spellbinders dies. 


Before adhering my florals and foliage to a dark indigo cardstock base, I used my Spellbinders Glimmer system to foil my sentiment in the lower corner using silver foil and the Elegant Twist Glimmer Borders and Sentiments set.  To finish the card, I used a white gel pen to add dots and accents to my flowers and foliage for some added interest.


I loved making this project and I hope you enjoyed it, too!  Links to the products I used are below.  I am a member of the Spellbinders affiliate program, which means that I receive a small commission at no additional cost to you when products are purchased through the links I share.  I truly appreciate your support! 


Thanks so much for stopping by today, and I'll see you again soon with another cardmaking project! 


Wednesday, February 24, 2021

Gouache + Stitched Background: Simon Says Stamp's Botanical Split Background Cling Stamp


I feel as though background stamps are under-appreciated.  Or maybe that's just me.  I admired them from afar on other people's projects, but I was never sure if I wanted to make the investment in one.  But I now see how not only can background stamps enhance other striking focal point images, they can stand alone and shine in their own right.  This gorgeous new Botanical Split Background stamp from Simon Says Stamp is such a beauty and quickly earned its place as one of my favorite stamps.  


This ingenious stamp splits into three wavy shapes, allowing you to easily stamp the segments in different colors to achieve gradients or bold color changes on your projects.  I decided to keep mine together and make it shine on its own.  I stamped my image in light gray ink (Simon Says Stamp Fog ink is perfect) on light pink cardstock.  I then brought out my gouache paints and did some quick, simple painting over the stamped images.  Acrylic paint would also work beautifully for this.  This took me about an hour and was like doing a paint-by-number.  So relaxing! 


I die cut the CZ Design Hugs sentiment three times from 110# white cardstock, layered them together with liquid adhesive for dimension, and adhered the stacked sentiment to my card.  If you're familiar with my projects, you know that I love adding stitching for extra texture, interest, and handmade detail.  The little dots on the stamp were the perfect excuse to do some french knots.  I pulled out some white embroidery floss and got to knotting.  This process was, again, very methodical and relaxing.  Some little floral sequins with dots of Nuvo Drops finished this card.  


I may add a sentiment strip later when I know who the recipient of this card will be, but I love this card just as is.  I just love this background stamp, and I hope this project inspired you to give some pretty background stamps their moment in the sun.  :) 


Links to the products I used are below.  Thanks so much for stopping by today and I'll see you again soon!


Friday, February 19, 2021

Papertrey Ink's Ink to Paper Effortless Beauties and Feathered Friends 8: Soft Stamped Floral Card


Every once in a while, a stamp set comes along that you instantaneously fall in love with.  The new Effortless Beauties stamp set from Ink to Paper is just that for me.  It pairs so beautifully with the new Feathered Friends 8 dies that I couldn't wait to make this card project! 


I started this project by stamping my floral images.  I knew I wanted to achieve a soft, earthy color scheme, so I pulled out my Distress Oxide Inks and my much-ignored pigment inks so I could achieve soft color blends.  I used sponge daubers to pounce my colors onto my stamps, which allowed me to mix colors and achieve subtle blends.  I used these same colors to blend the die cuts of the sweet little bird before assembly. 


Before adhering my images, I ink blended some Speckled Egg Distress Oxide Ink onto a white cardstock base and onto a circle I die cut using the Love to Layer: Scalloped Circles dies.  I stamped my sentiment in the corner, arranged my florals around the circle in a loose configuration, and added a branch from the Tag Creations: Blooming Indulgence die set.  I decided I wanted my bird to have some dimension, so I die cut 3 more base layers and adhered them all together to create a thicker bird shape.  I adhered the bird into the center of the florals and added some gold watercolor splatters to finish this card. 


These floral images are so beautiful that I have two more projects planned, which I am currently chomping at the bit to make!  Links to the products I used are above.  I'll be back soon with these additional projects and I hope you'll stop by again to check them out.  Thanks so much for hanging with me through this amazing new release from Ink to Paper, and I hope you found some inspiration to create some fun new projects of your own!  


Papertrey Ink's Ink to Paper She Blooms Stamps and Dies: Creating a Feminine Floral Tulle Shaker Card


What a lovely new image from Ink to Paper!  Isn't this woman in her flowing floral dress just gorgeous?  This image was the inspiration for this feminine tulle shaker card, and I'm excited to share the process with you today! 


I was inspired by a piece of pretty patterned paper in selecting the colors of my card.  I stamped my main image onto white 110# cardstock, coloring it in with Copic markers in hues complimentary to the patterned paper.  After die cutting it with the coordinating dies, I created my base panel.  I created a panel by die cutting a white panel with the Cover Plate: Ornate die, affixing it to an 80# cardstock base.  I die cut an oval into this panel using the Geometrix: Oval dies then set about making my shaker panel.  I first attached a layer of tulle behind the window using double sided tape.  I sprinkled some white and iridescent confetti onto the tulle, and affixed another layer on top using more double sided adhesive to make sure it was extra secure.  I then used foam tape to pop this panel up, affixing it over my piece of floral patterned paper.  The confetti glides to effortlessly between the tulle layers... I just love these pretty, feminine shaker cards! 


All that was left to do was adhere my main image over the panel using liquid adhesive.  I stamped my sentiment onto a flag made from the same patterned paper and adhered it to the upper corner of my card.  


This is such an impactful image that creates the most beautiful cards.  I hope you enjoyed this project!  Links to the products I used are above.  I'll be back again today with one more project from this absolutely beautiful new release.  See you soon!  


Custom Post Signature

Custom Post Signature