Tuesday, April 2, 2019

Paper Embroidery Card with Pinkfresh Studio's Heart and Soul Stamp Set


You know when you see a stamp set and you immediately know you have to have it?  We've all had those moments, right?  When I saw Pinkfresh Studio's Heart and Soul stamp set, I had one of those moments... I knew I wanted to try to stitch it, and it went straight into the cart!

This stamp set is so delicate and beautiful, and it took to stitching just perfectly.  The process was really simple... I stamped the image, poked holes along the image lines, and stitched it up using a simple backstitch.  I wish photos did justice to the texture that stitching brings to cards... there is just nothing like it!


After stitching, I decided I wanted to make a shaker card.  I remembered a video I had seen from the genius Jennifer McGuire about tulle shaker cards, and I thought it would be the perfect way to finish this delicate card.  This process was simple... I first fussy cut a window from the image (which, incidentally, was probably the most difficult part of this card for me - I am NOT good at fussy cutting!  I'd love to hear any tips!).  I lined the window with a piece of tulle, sprinkled in some flat flower and leaf sequins, and layered another panel of tulle over the back, securing everything with strong double-sided tape.  The sequins of so beautifully between the tulle layers.

I added some gems and flower sequins for some added sparkle and interest.  After embossing my sentiment in gold, this card was done!  I just love how everything came together here - it's hard to go wrong with such a gorgeous stamp set.


I hope you enjoyed this project!  A link to this gorgeous stamp set is below.  I participate in the scrapbook.com affiliate program, which means that I receive a small commission from products purchased through the links I share at no additional cost to you.  Thank you for your support - it is very much appreciated!


Wednesday, March 27, 2019

Using Stamps in Embroidery in Two Ways: Traditional Embroidery and Embroidery Hoop Card #4 with Catherine Pooler Grateful Heart Stamp Set


Hello, crafty friends!  To say that I became obsessed with these two projects would be, well, a fairly big understatement.  I LOVED working on these stitched pieces!  As soon as I saw Catherine Pooler's gorgeous Grateful Heart stamp set, I knew I wanted to try to stitch it.  Life got in the way for a while, but as soon as I was ready to pick up a needle again I grabbed this set and got to work.


I started with stitching up a traditional embroidery hoop.  It had been forever since I had stitched on fabric, and I had forgotten how different the technique is than stitching on paper!  I stamped my images on linen using black dye ink and my Misti.  I HIGHLY recommend using a stamp positioner for stamping on fabric because it can take a few tries before you get a clean impression.

I LOVE the sweet "Oh, hello there" die from Simon Says Stamp and wanted to use it as my sentiment on the hoop.  I used the die cut negative space and traced the letters using a mechanical pencil.  I then colored in the letters using a watercolor pencil and used a simple backstitch to outline the words.

All there was to do then was stitch up the floral details!  I used a combination of satin stitches, fishbone stitches, straight stitches, french knots and woven rosettes to embellish the stamped images.


As you might know, though, I LOVE stitching on paper and couldn't leave this project without making a coordinating greeting card.  I re-stamped the images onto white cardstock using a gray ink and colored them with Copic markers.


I then used some similar, but simpler, stitches to embellish this card, using backstitches, fishbone stitches, french knots, and woven rosettes to stitch the stamped images.  Although it is a ton of fun to stitch on paper, it does pose some limitations.  Too many holes too close together (such as in satin stitch) can result in your paper tearing, so simpler stitches often provide the best results.

I love embellishing my stitched cards with wool felt flowers for added dimension and interest, so I used Simon Says Stamp's Mini Flowers and Leaves die to cut some sweet little blooms and leaves.  I adhered these elements with simple straight stitches and french knots.

This set will go to a very special crafty friend... I hope she loves them as much as I loved making them!  I am so happy you stopped by and would love to hear what you think about these projects - I hope you enjoyed them!


Thursday, March 7, 2019

Simon Says Stamp Fresh Blooms Release: Stitched Card With Sketched Flowers and Tiny Words Faith Stamp Sets


Hello, my friends!  How I have missed posting here.   Life has been... life.  A little unrelenting for the past couple of months.  But I am so happy that things have been calming down as of late, which has allowed me to get back into the craft room and start creating again.

I started creating again just in time  for me to play with the new Tiny Words Faith stamp set from Simon Says Stamp's new Fresh Blooms release.  I just love these Tiny Words sets... they are so chock full of sentiments that can either stand alone or combine with other stamp and die sets.  I find myself reaching for them all the time!

It had been way too long since I had stitched a card, so I decided to take out my Sketched Flowers set and stitch up the blooms.  I started by stamping the flowers and coloring them with a combination of Copic markers and Polychromos colored pencils.  Then came my favorite part: the stitching!  I simply poked holes along the stamp lines and stitched up the flowers using a simple back stitch.  Crafty confession... about halfway through the stitching process I wasn't sure I was liking how it was coming out.  But since I had already spent the time, I decided to persevere... and I am so happy I did. I love the way the stitching came out!


Even with the stitching, I decided I wanted to add more texture and dimension to the card.  I used Simon's Mini Flowers and Leaves die set and Paper Smooches Flowers and Flowers 2 dies to create some teeny tiny felt flowers and leaves.  I then used Simon's Miss You die to cut out the "you," and stamped my sentiment from the Tiny Words Faith set underneath.


I just love the way this card turned out and I hope it inspires you to try some stitching on your cards!  I'll be back soon with some more card stitching... I have a project I am just having a blast working on.  Thanks again for stopping by and I hope you have a GREAT day!
Saturday, February 2, 2019

Spring Flutter: Spellbinders February Small Die Kit of the Month


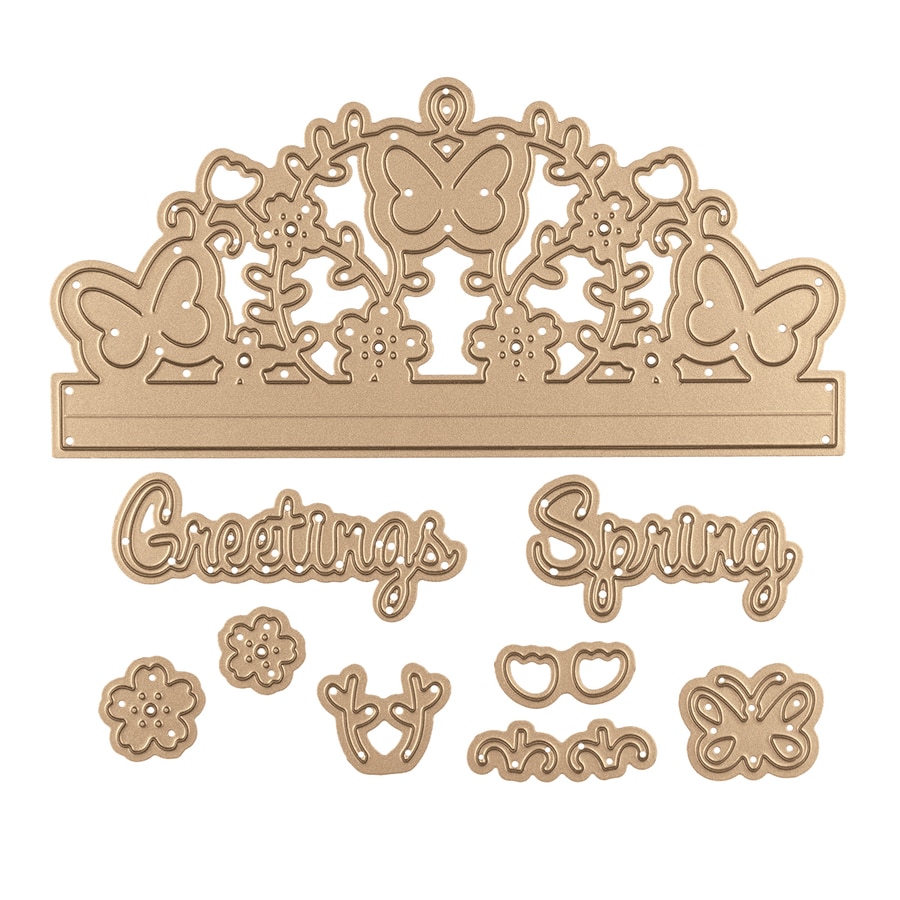
You know when you see a stamp or die set that just speaks to you?  This is exactly how I felt when I opened the new Spellbinders Spring Flutter Small Die Kit of the Month.  The dies in this kit are incredible... the details!  I have so many different ideas for how to use this kit, and I'm so happy to be here today with my first project.


The main die in this kit is perfect for making a beautiful gatefold card, which is how I originally started my project.  I first die cut two of the gatefold dies, coloring in the details with Copic markers. As I went on, however, I thought that the intricate vines and butterflies would look beautiful mounted on a vellum base.


I started layering the die cuts to create some dimension and interest and added some additional leaves on top of the flowering vines (those little leaves are the negative spaces out of the butterflies' wings!) 


I mounted the vellum on top of a light pink panel and mounted that onto a card base.  I love how the little die cuts really jump off the page... they are truly sweet and special!  


I loved making this project and hope that you enjoyed it!  A link to the Spellbinders Small Die Kit of the Month is below.  I participate in the Spellbinders affiliate program, which means that I receive a small commission at no additional cost to you when products are purchased through the links I share here.  Thank you for your support!  

I'll be back soon with another project made with the gorgeous kit.  Have a wonderful day!  


Custom Post Signature

Custom Post Signature