Wednesday, October 31, 2018

Die Cut Felt Snowflake: Spellbinders Charming Snowflake Doily


I can never get enough of working with wool felt, and I knew I wanted to use it when I had the opportunity to create a project with Spellbinders's new Charming Snowflake Doily Die by Becca Feeken.  This snowflake is wonderfully sweet and intricate, which lended it so well to wool felt and some added stitching!  

I started out by applying a generous amount of Alene's Stiffen Quik to my wool felt to avoid tearing during the die cutting and stitching process (it also makes it easier to adhere intricate wool felt pieces).  I die cut the snowflake using both white wool felt and white smooth cardstock.  I colored the interior pieces with Copic markers and inlayed them into the cardstock snowflake.  I then adhered the wool felt piece over the top, creating some pretty soft texture and dimension.  

I then poked holes around some of the interior sections and around the perimeter of the snowflake and added some coordinating stitching.  


This snowflake makes such beautiful projects... in addition to cards, I am envisioning gift tags and gorgeous ornaments.  I love being able to coordinate card projects to the gifts they accompany, and this die is just perfect for that!  


Links to the products I used are below.  I participate in the Spellbinders affiliate program, which means that I receive a small commission at no additional cost to you when products are purchased through the links I share.  Thank you for your support, and I hope you enjoyed this project!   

Tuesday, October 30, 2018

Pinkfresh Studios October Challenge: Die Cut Paisley


Hello crafty friends!  Did you know that Pinkfresh Studios hosts a monthly challenge on their blog?  I am getting this card in just under the wire for Pinkfresh's October Challenge, which is all about fussy cutting and die cutting.  I LOVE die cutting.  When my crafty mojo decides to take a break (which happens all too often!), I always find myself falling back to die cutting.  In fact, I probably consider myself more of a die cutter than a stamper.  I just love arranging shapes into pretty arrangements.  

I'd had it in my mind to combine two of my favorite Pinkfresh sets - Pretty Paisley and Fleur 1 - into one card, and this was perfect for the die cutting challenge.  Pinkfresh's Pretty Paisley is one of my favorite sets - I just LOVE pretty floral paisleys.  I started by die cutting a paisley into the center of my card.  I used my Misti stamping tool to align the gorgeous garden image into the center of the paisley and stamped it onto watercolor paper.  I then watercolored the garden using my Zig Clean Color Real Brush Markers and added some tiny gold french knots and gold sequins for a little subtle sparkle.  

After that, the die cutting fun began.  I wanted to create interest by adding different individual floral die cuts to my paisley, so I stamped, watercolored and die cut different images from the Fleur 1 set.  I also wanted to create a little dimension inside the paisley, so I stamped the garden image again, watercolored the 4 little tulips, and fussy cut them out.  I layered them into the paisley using foam tape.  


I stamped my sentiment from the Pretty Paisley set, and decided to add some texture and interest to the card by adding watercolor splatters and hand stitching around the card base and paisley.  I then applied foam tape to the back of the paisley piece and layered it on top of the watercolored garden base.  I added my die cut pieces around the perimeter of the paisley, and the card was finished!  


You can check out Pinkfresh's monthly challenges on their blog here.  Links to the products I used are below.  I participate in the Scrapbook.com affiliate program, which means that I receive a small commission at no cost to you when products are purchased through the links I share.  Thank you so much for your support!  

I had so much fun creating this card and I can't wait to see what they have in store for us next month!  I hope you enjoyed this project - I'd love to see your die cut projects!  Have a wonderful day!    


Friday, October 26, 2018

Embroidery Hoop Art Card #2: Neat and Tangled & Simon Says Stamp


Hello, everyone!  Life has taken over and there hasn't been much time for crafting, but I am so excited to be back to share another embroidery hoop art card.  This time I used some gorgeous products from Neat and Tangled as my stitched focal points.

I first stamped images from Neat and Tangled Friendly Florals set onto a circle cut from smooth white cardstock.  I then die cut and adhered Neat and Tangled's beautiful "Hello" die onto the panel.  Then the fun started... the stitching!  I decided to stitch some of the blooms and color others with Copic markers to give interest to the card.


I used a satin stitch to fill in the large flower and some of the smaller blooms from the stamp set, and used a simple back stitch to outline the images I had colored.


I also added stitched roses because I LOVE them ðŸ˜Š... they add so much texture and dimension to a card and are so fun to make!  Wanting to create even more visual interest, I nestled in some tiny wool felt flowers I cut from Simon Says Stamp's Mini Flowers and Leaves die (LOVE this die... so many uses!), attaching them with french knots.


I finished off the embellishments with french knots and Pretty Pink Posh sparkling clear sequins.  I then cut a circle frame using my Hero Arts Infinity Circle dies and affixed everything to a circular card base.

You guys, these embroidery hoop art cards are my JAM.  I absolutely love making cards - all kinds of cards - but these bring me so much happiness.  I am always happy to answer any questions, so please feel free to leave me comments here or contact me above if you'd like to make a project like this.  I hope you enjoyed this project, and have a great day!!!


Thursday, October 11, 2018

Simon Says Stamp Fun & Festive Release: Dancing Deer Card


Hello crafty friends!  I'm so happy to be here today with a card made with the new Dancing Deer die from Simon Says Stamp's new Fun & Festive release!  There are so many fantastic holiday stamps and dies in this release (The Critter Sweaters stamps and dies... yes, please!)

I'm all about circular cards lately, and I thought it would be fun to create a circle card featuring this leaping deer.  I first out out a circle with my Hero Arts Infinity Circle dies and ink blended some Tumbled Glass Distress Ink (I also splattered on some extra ink for more interest).

I cut the deer out of a chocolate-colored cardstock and white heat embossed the inside pieces with snowflakes from Hero Arts' Color Layering Christmas Trees stamps.  I then cut the deer out again with silver foiled cardstock and pieced the embossed pieces inside.


After adhering the deer to the circle panel, it was time to embellish!  I die cut poinsettias with Simon's Poinsettia Parade die and ink blended them with Spun Sugar and Picked Raspberry Distress Oxide inks.  I cut leaves and foliage out of the same die and Paper Smooches' Wreath Builder dies and colored them with Copic Markers.  I also cut white branches with Memory Box's Holiday Twigs dies.  After adhering my poinsettias and foliage around the deer, I embellished the branches with red french knots and the centers of the poinsettias with Pretty Pink Posh Fairytale Fuchsia sequins.  I also adhered some Pretty Pink Posh Clear Droplets for additional interest.


To finish the card,  I die cut my sentiment with Poppy Stamps's Peace on Earth Doodle Script die, ink blending it again with Spun Sugar and Picked Raspberry Distress Oxide Inks.  I cut a frame using the same Infinity Circle Dies and adhered it to the outside of the card.

I hope you enjoyed this project!  I had a blast creating it.  I am off to check out the rest of the new release... I truly look forward to Simon's holiday release every year!

Tuesday, October 9, 2018

Nordic Deer Cross Stitch Card on Altenew Cross Stitch Canvas (with free pattern!)


So I've been fighting off a nasty cold virus for about a week now.  The ONLY upside of being sick is that it forces me to slow down on the 8 million tasks or plans (give or take 😜) I have for myself every day and rest.  And what that means is stitching time!  This card is the culmination of a few days of doing nothing except developing a pattern, stitching, and coughing.  ðŸ˜· 

I knew I wanted to make a more intricate pattern, and Altenew's Cross Stitch Canvas die is perfect for this purpose.  I developed my design by taking various cross stitch images I found on Pinterest and assembling them into one pattern using the free www.stitchfiddle.com pattern maker.  I love using this site because it allows you to tailor your patterns to the exact dimensions of your die.

After that, all there was to do was start stitching!  I have a few tips for stitching projects using this die:

  • Use the heaviest cardstock you have on hand.  I used Neenah Solar White 110# for this card.  The cardstock is going to be pulled at quite a bit (especially with intricate designs), so the heavier, the better.
  • Enlarge your holes before stitching.  I used a paper piercer (Tim Holtz's ______ is perfect for this) to make the holes slightly larger before stitching.  
  • Use no more than two strands of floss.  Anything more will be a bear to get through all those little holes!  
I finished the card by heat embossing my sentiment from my favorite Holly Jolly Sentiments from Scrapbook.com on vellum because I didn't want to cover up any of the beautiful stitching.  


I've included my pattern here if you would like to re-create or adapt this card for yourself.  I hope you enjoyed this project and are inspired to make your own cross stitch projects.  I would love to see what you make!  


Links to the products I used to make this card are below.  I participate in the Scrapbook.com affiliate program, which means that I receive a small commission at no cost to you when products are purchased through the links I share.  Thank you so much for your support!


Monday, October 8, 2018

Altenew Build-A-Flower Flourishing Zinnia Giveaway Winner!


Thank you to everyone who stopped by for Altenew's Build-A-Flower Flourishing Zinnia blog hop!  I appreciated each and every comment and I'm so thrilled you all stopped by.  Using a random number generator, the winner of the $20 Altenew gift card is:


Congratulations, Teresa!  Please contact Altenew at winner@altenew.com by 10/20/2018 with the subject line Altenew Build-A-Flower Flourishing Zinnia Blog Hop Winner from Leigh Houston's Stitches in Paper Blog.

I hope to see you all again for the next release soon! Have a GREAT day!!! xoxo


Monday, October 1, 2018

Altenew Build-A-Flower Flourishing Zinnia Blog Hop + Giveaway!


Yay!  It's time for another Altenew Build-A-Flower release!  If you're hopping along with us, you might be visiting me from the lovely Laurie Willison's blog.  If you're jumping in here, you can start back at the Altenew Card Blog for all the details.  I also have the entire blog hop list at the end of this post in case you've missed anyone!

Oh my... this month's Build-A-Flower Flourishing Zinnia is GORGEOUS.  I love zinnias.  They come in a happy rainbow of hues, and they are my favorite go-tos when fall color starts to fade my otherwise colorful garden. But not only do I love the flowers, I love the process of stamping this set.  I recall stamping the second layer of the image for the first time and saying, "Oh!" And then stamping the third layer and saying "WHOA!" (and laughing as my little dog lifted his head wondering who I was talking to 😂)  This is just an absolutely beautiful stamp set.


I always like to stretch my supplies, so I decided to try a "one stamp, three mediums" challenge.  I started by stamping some flowers with my Altenew Crisp Inks.  Did you know that the only color zinnias do not naturally come in is blue?  One of my favorite things about stamping is that we can make flowers any color we want, so I stamped my zinnia in Mountain Mist, Volcano Lake, and Lagoon inks.  Not content to leave this beautiful bloom by itself, I stamped a garden of blooms with Altenew's
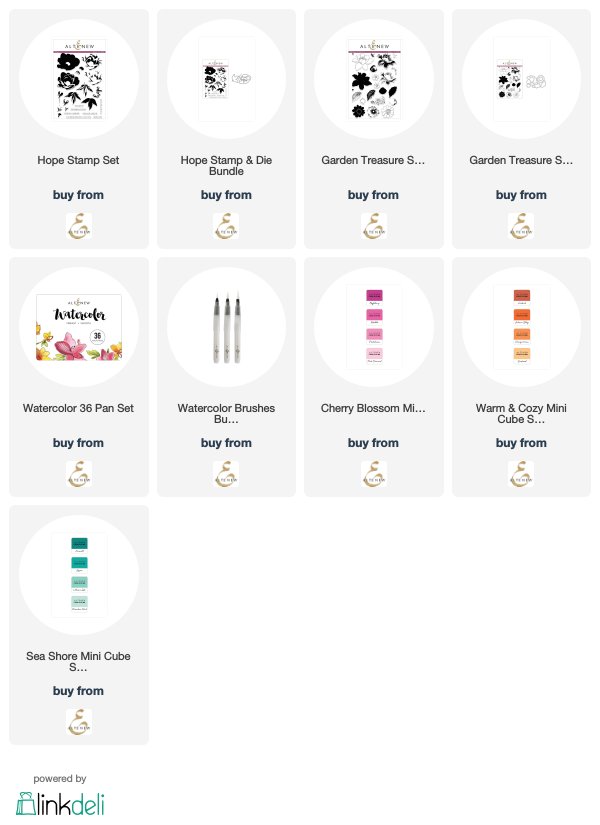
 Hope and Garden Treasure sets and layered the images together.  I stamped the sentiment with Volcano Lake ink. As you know, the crisp inks are so vibrant and this garden just pops off the card!


I loved the first card so much that I decided to stamp a second card, this time using Pink Diamond, Pinkalicious, and Rubellite inks for one flower and Sunkissed, Orange Cream, and Autumn Blaze inks for another.  I then watercolored a background panel using my Altenew watercolor pan set and layered the blooms on top.  


After stamping the sentiment and embossing it in gold, this card was finished!


For my third card, I wanted to try stamping my images with Distress Oxide Inks on kraft paper.  I layered Spun Sugar, Picked Raspberry and Candied Apple (slightly toned down with Picked Raspberry) inks for my pink flower.  I then masked off that flower and stamped a second with Tumbled Glass, Peacock Feathers and Salty Ocean inks.  I used foliage from the Hope set and stamped them with Peeled Paint and Iced Spruce Inks.  I stamped the sentiment to match the foliage.  


I had never tried stamping with Distress Oxides on kraft paper before, and I love the rustic charm of the final result.  


For my last card I wanted to try to achieve a different look, so I decided to try using watercolor pencils to color my image.  Again going with blues, I stamped my first layer using Altenew's Limestone ink on watercolor paper.  I colored over the ink with watercolor pencil, and used my Altenew water brush to soften the layer.  I then stamped over this base layer again using Limestone ink, colored over the ink, and softened it again using my water brush.  I repeated this process for the final layer.  I once again used the foliage from the Hope stamp set for my leaves, again stamping, coloring, and softening with water.  


For my sentiment, I colored a blue gradient with my watercolor pencils, blended them with water, and die cut a "Hello" from the Blooming Bouquet stamp and die set.


I hope you enjoyed these projects!  I love the different looks you can achieve using different mediums to color your images.  This set is just perfect for playing with these techniques!  

PRIZES!!! 

To celebrate this release, you have a chance to win a $20 gift certificate right here!  Just leave me a  comment below and I'll choose one lucky winner by October 5, 2018!  Good luck!!!

Altenew is also giving away a $30 gift certificate to six lucky winners!  Please leave a comment on the Altenew Card Blog and/or Altenew Scrapbook Blog for a chance to win.  Three winners will be announced on the Card Blog, and the other three winners will be announced on the Scrapbook Blog on October 9, 2018. 

Thanks so much for visiting my blog!  Next stop on the blog hop is my wonderful friend Rubeena Ianigro.  I can't wait to see what she creates!  Enjoy the blog hop and have a WONDERFUL day!!! 

The blog hop order is:


Links to the supplies I used are below.  I participate in the Altenew affiliate program, which means that I receive a small commission at no additional cost to you when products are purchased through the links I share.  Thank you for your support!


SaveSaveSaveSaveSaveSaveSaveSave

Custom Post Signature

Custom Post Signature