Saturday, May 18, 2019

Teacher Thank You Notecards with Pinkfresh Studios April Release Dies


In my book, it is never too early to start those end-of-the-year teachers gifts.  These always sneak up on me and I spend a week frantically trying to create last-minute gifts or notecard sets.  Not this year, if I can help it!  Pinkfresh Studios' April release was full of gorgeous dies, and there is no easier way to create cards with dimension and impact than using beautiful dies... they do all the work for you!


I made four different notecards for this set, taking my inspiration from a beautiful grosgrain ribbon I found in my stash and some chartreuse polka dotted paper.  My first card used Pinkfresh's Jar Full of Hearts die.  I created a small shaker using the die, layering up 4 layers of die cuts and doing some simple Copic coloring on the jar and hearts.  I stamped my sentiment from Pinkfresh's Hanging Florals stamp set, did some quick stitching around the panel, and layered some of the patterned paper and ribbon to finish.


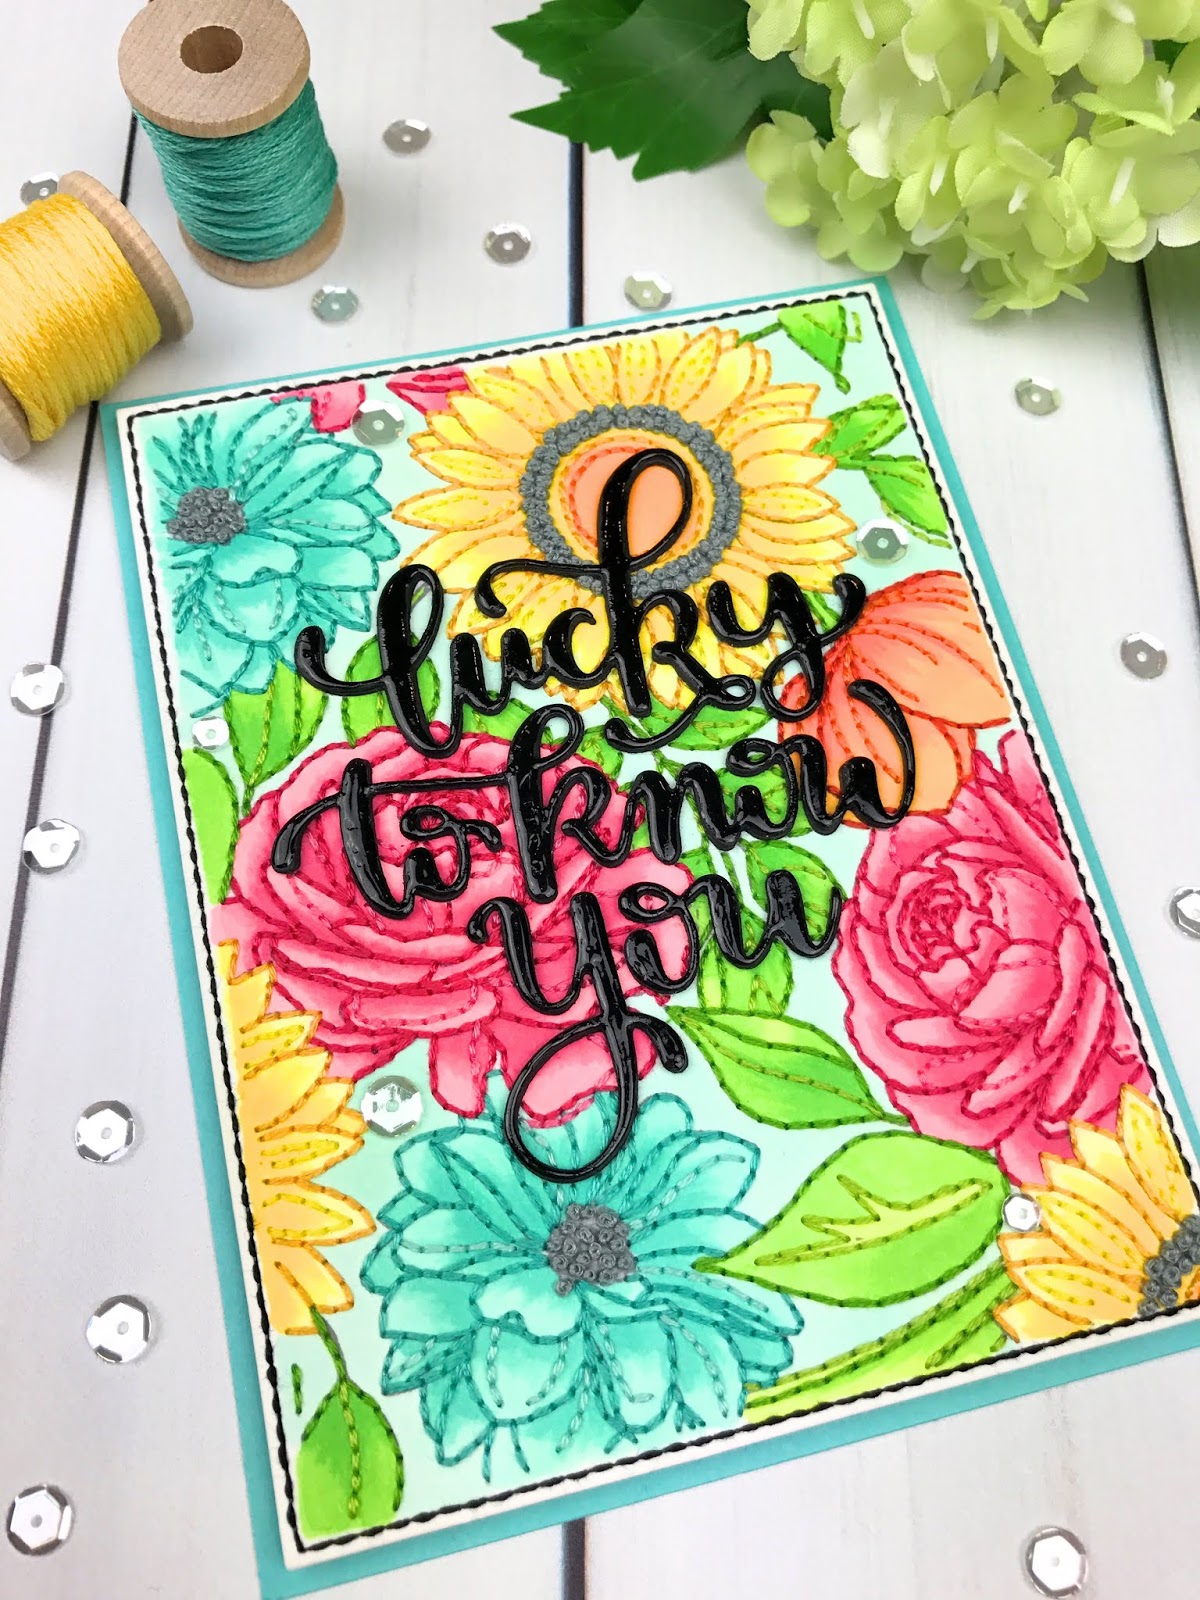
For my second card, I used the new Partial Cut Bouquet and a Bow dies.  This card was so simple... I simply cut a two different layers of the blooms and did some simple Copic coloring.  I cut my bow from hot pink patterned paper and stamped my sentiment from Pinkfresh's Say It With Florals stamp set.  I added some stitching around the panel and some little cupped flower sequins for some added sparkle.  I layered the panel on top of coordinating cardstock added some of the ribbon.


For my third card, I used Pinkfresh's new Leafy Wreaths die set.  I cut the wreath out of the chartreuse patterned paper, and cut an additional layer out of light pink cardstock to layer underneath.  I stamped my sentiment and added some cupped flower sequins, some clear gems, and some Nuvo drops for some added interest.  I finished this card with some simple stitching and more paper and ribbon layering.


My last card again uses the Partial Cut Bouquet and a Bow dies.  This time, I created a panel with a center circle and layered bunches of the little blooms underneath.  I cut the bow from wool felt and layered the panel on top of more colored cardstock and ribbon to finish.

These cards are intended for a dear school nurse who is retiring after many years of selfless service to our school district... she will be missed indeed.  I hope these cards bring a smile to her face.  They came together so quickly, but pack so much punch due to the beauty and intricacy of the dies.

I hope you enjoyed these projects.  I'd love to hear which of these cards is your favorite... I need to make one more to complete the set but I can't decide which one I am going to duplicate!  :)


Wednesday, May 15, 2019

Celebrating our Veterans: Simon Says Stamp American Flag Stencil Shaker Card


Simon Says Stamp has an incredible new Celebrate You release, and I was so happy to be able to create this project with their new American Flag stencil.  This card was created with our veterans in mind; I have beloved family members who have served in our military, so this card is quite meaningful for me!

This stencil made it so easy to create this card.  I used traditional red and blue inks with the stencil to create the flag.  I then stamped a bold "Thank You" sentiment from Simon's Thank You Flowers stamp set in black ink, and again used the stencil and Hero Arts Unicorn pigment ink to create the stars in the flag.

To make the shaker portion of the card, I wanted to create a fireworks scene for some sparkle.  I don't have any fireworks stamps (how can this be?), so I found some fireworks clip art and printed it out on a laser transparency.  I then ran it through my Minc machine with some gold foil.  I created the frame with Hero Arts' Postage Stamps Nesting Dies, cutting out the interior with a standard rectangle die.  I added some gold stitching around the perimeter.

I assembled the shaker using some foam tape and filled it with Pretty Pink Posh star confetti.  This was such a pleasure to make... we are going to send this one to our favorite brother in-law/uncle who has served tours all over the world in the U.S. Army, including two in Iraq.  What a joy it was to make this card for him!

I hope you enjoyed this project!  This new release celebrates so many different people in our lives... it is just fantastic!


Monday, May 13, 2019

Paper Stitching with Simon Says Stamp's Floral Mix Background Stamp


Have you ever seen a stamp and wondered if the stamp designer had somehow read your mind and designed a perfect stamp just for you?  This is exactly how I felt when I saw Simon Says Stamp's Floral Mix Background stamp.  But shame on me... I waited a few days to order it and much smarter crafters than I scooped it up.  So I waited (incredibly impatiently) for it to come back in stock and didn't waste any time in placing that order.  

And this stamp did not disappoint... I had such a blast making this stitched card.  I started out by stamping my image on Neenah Solar White 110 lb cardstock in Copic-friendly ink.  I colored my flowers in colors my beautiful daughter chose, and I loved her bright and happy selections.  

I knew I wanted to adhere Simon's "Lucky To Know You" sentiment in the middle of the card ad stitch around it, so I die cut one layer and adhered it to the center of my card.  It was then time to stitch.  I'm not gonna lie... this took a while.  But I love every moment of stitching these cards - it is so methodic and relaxing - that I never mind the length of the process.  I simply poked holes along the stamp lines and stitched up the outlines in coordinating thread colors.  I added some french knots in the centers of a few of the flowers for even more texture.  


To finish the card, I adhered some of my favorite Pretty Pink Posh Sparkling Clear sequins and added some black stitching around the border of the panel.  I then die cut several more layers of my sentiment die and adhered them together to create dimension, and added some Nuvo Crystal Glaze on top for some shine.  


I had such a blast making this card that I'm already hankering to make another.  I'd love to hear color suggestions if you have any!  

Thanks so much for stopping by today - if you have any questions or comments about this project, please be sure to leave them below and I'll be sure to get right back to you!  
Friday, May 3, 2019

Highlighted Stitched Sentiments: Pinkfresh Studios You've Got This and Embroidered Flowers


Happy Friday, everyone!  I'm back today to share two more cards I made using Pinkfresh Studios' new You've Got This stamp set.  I just love the sentiments in this set and I wanted to give them special focus in these two cards by stitching them up... I love the texture and dimension that stitching adds to these special phrases.


If you haven't stitched a card before and would like to try it, this first card is the perfect place to start. The sentiment is beautiful but simple in its lines.  I started the card by stamping some pretty blooms in pastel hues from Pinkfresh's Embroidered Flowers stamp set in the center of my card.  I then stamped my sentiment over the flowers and poked holes along the lines of the words.  I have a couple of tips for achieving smooth stitch lines.   First, make sure to poke a hole wherever two lines intersect with each other.  Second, when poking holes along curves, poke them a little closer together than you would along straight lines.  This allows you to avoid choppy-looking stitch lines.


I added some small stitched details and some pretty flower sequins.  This card is so clean and simple, but the stitching adds just the right amount of texture and interest.


For my second card, I went all out with the stitching.  I first stamped my sentiment in the center of the card in pool-colored ink and surrounded it with floral images from Pinkfresh's Fleur 1 stamp set.  I then colored the flowers in with Copic markers.  I then stitched up all of the images using the techniques described above.  This takes some time but is so meditative... it is the perfect project to take to the couch for a Netflix binge!


I hope you enjoyed these projects!  It's no secret that I love stitching, and I had a blast creating these. You still have time to enter the giveaway to win a $25 Pinkfresh Studio gift certificate... be sure to visit this post and leave a comment for your chance to win!

Thanks for stopping by today!  xo
Wednesday, May 1, 2019

Stretch Your Watercolor Supplies: Pinkfresh Liquid Watercolors with You've Got This and Embroidered Blossoms Stamps


I recently ordered Pinkfresh Studios' Liquid Watercolors and just fell in love with the beautiful, vibrant colors.  Always looking for a way to stretch my supplies, I wondered if there was a way for me to combine these colors with gouache (one of my favorite painting mediums) for a new look.  The answer was a resounding yes... and I was amazed at how easy and effective this was in creating my own custom paint colors!

I started my card by stamping my sentiment from Pinkfresh's new You've Got This stamp set (one of my most favorite sentiment sets EVER... I just love this set!) and flowers from the Embroidered Blossoms set using light-colored ink on pool-colored cardstock.  I then created all of the colors in my card today by mixing Pinkfresh liquid watercolors with white gouache.  So simple!  To mix my colors, I would simply take a small dollop of white gouache and mix in drops of the liquid watercolors until I achieved the shade I was after.  After that, all there was to do was paint!  I love how the opacity of gouache allows you to paint directly onto colored cardstock.


I also love painting with gouache because its opacity allows you to paint light colors on top of dark colors.  Although I loved this card from the beginning, I really started having fun when I started creating unique color combinations on the leaves.  Combining these non-traditional colors together really brought the card to life.

I finished my card by adding little white dots using the same white gouache.  I hand stitched a few little white flower sequins onto the card because I just can't seem to finish a card without stitching something!


This project came together so incredibly easily using the Liquid Watercolors and a little white gouache.  I hope you give this technique a try!

If you haven't already, be sure to check out this post for your chance to win a $25 gift certificate to Pinkfresh Studios!  A winner will be selected on May 6, 2019.  Have a great day and happy crafting!


Custom Post Signature

Custom Post Signature