Thursday, November 29, 2018

Embroidery Hoop Card #3: Honeybee Stamps Rejoice


What do you do on those days when you have the best intentions to get #allthethings done, but life throws you a curve ball and destroys all of your motivation?  I'm kind of all over the place.  Sometimes I'll motor and get things done anyway, sometimes I'll crawl back into bed, and other times I just sit around wishing I knew what to do.  I had one of those days... and this card was the result.  Initially just a distraction, it turned into singular focus and motivation to complete something that day.  

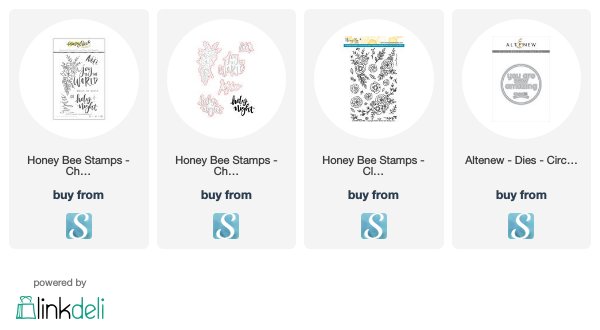
I absolutely adore Honeybee Stamps's Rejoice stamp set... I bought it as soon as I saw it and thought it would make a beautiful embroidery hoop art card.  I started by creating a circular card panel,  stamping out the sentiment in black ink, and embossing it with clear embossing powder.  I then stamped out the large floral cluster from the stamp set in light gray ink.  To supplement the bouquet, I stamped some additional florals along the bottom and right side of the using Honeybee's Country Blooms stamp set, which is the perfect compliment to the Rejoice set.


I then colored the florals using Copic markers and shading with Polychromos colored pencils.  After that came the stitching (my favorite part).  I outlined the floral images with simple back stitches, stitched the leaves using a leaf stitch, and used lazy daisy stitches to outline some of the smaller foliage.  I stitched over the circles using french knots.


To add some additional dimension to the card, I added a small poinsettia and leaves from Simon Says Stamp's Poinsettia Parade die.  I then added some of Honeybee's shaped flower sequins and did some subtle ink blending over the sentiment.  To finish the card, I added a circle frame cut from woodgrain patterned paper and an embroidery hoop top from Altenew's Circle Embroidery Hoop die.


I look at this card as sort of a triumph... if only I could motivate to complete a project on every bad day!  Links to the products I used are below.  I participate in the Scrapbook.com affiliate program, which means that I receive a small commission at no cost to you when products are purchased through the links I share.  Thank you so much for your support!


Tuesday, November 27, 2018

Pretty Floral Wreaths with New Spellbinders Clear Stamps


It's no secret that I love floral stamp sets, and I am always in need of versatile and pretty sentiment sets.  So I was absolutely thrilled to receive Spellbinders's new Thanks a Bunch and Sentimental Words stamp sets.  Spellbinders has released a beautiful new line of clear stamps, and these sets were right up my alley.

These two cards were so easy to make.  I decided to make two floral wreaths in different color schemes.  I started my first card by choosing pretty shades of pink and coral and stamping out a base layer of flowers and foliage.


As pretty as that was, I thought the card could use some dimension for extra interest.  So I stamped out extra flowers and leaves and quickly fussy cut them out.  I then layered them on top of the base wreath, which added so much extra texture and dimension to the card.  I added some small stitched details to the flower centers and added stitching around the edge of the panel.  To finish the card, I layered my panel over some coordinating patterned paper.


The second card came together much like the first card.  After stamping an oval-shaped wreath on an icy blue panel using distress oxide and pigment inks, I layered additional fussy cut flowers on top for dimension.  I stamped my sentiment from the Sentimental Words set to finish the card.


I just love stamp sets like this where simple yet pretty images come together in such a beautiful way!


I hope you enjoyed these projects!  Links to the products I used are below.  I participate in the Spellbinders affiliate program, which means that I receive a small commission at no additional cost to you when products are purchased through the links I share.  Thank you for your support, and enjoy your holiday crafting!


Friday, November 23, 2018

Thoughts on Gratefulness: Concord & 9th's Grateful for Everything


This card is the culmination of a few different forces coming together in the perfect creative storm.  Fall was abruptly kicked out of the Northeast on Thursday by a (rude and extremely disruptive) late fall snowstorm that virtually crippled our area that evening.  That meant this girl was outside snow blowing the driveway (my most loathed winter responsibility) late at night, lamenting my snow-covered mums and silently cursing the freezing rain making the chore all the more miserable.

As I made my way through the snow, I found myself thinking a lot.  I realized that fall flew by in an instant and that I had never made any fall-themed cards.  Oops!  But I also found myself thinking about my dad.  My husband travels for work a lot, and before my dad got sick, he would always call me during a snowstorm to check on me and the kids and tell me that if I had trouble with the snow, he would come right over to help.  Despite the fact that I think about and miss him every day, his absence becomes so profound at certain moments like these.  Although I allow myself to be sad, I also try to remember my gratitude for the fact that he was such a profound influence in my life.  I am so grateful that I had him as my dad... I couldn't have asked for a better father or grandfather for my kids.

I came inside, dried off, and couldn't sleep.  Thus... this card.  Nothing seemed more fitting than a fall-themed gratitude card.  I stamped out Concord & 9th's beautiful Grateful for Everything floral arrangement on watercolor paper and used my Zig Clean Color Real Brush Markers to watercolor the images.  I experimented with layering different color washes, first laying down a base color, letting it dry, then laying more washes of color on top.  I was so pleased with the depth and interest you can achieve this way!


I originally intended this card to be a single-layer card, but I stamped my sentiment crooked.  ðŸ˜•  So out came the fussy cutting scissors!  After cutting out the images, I stamped my "Grateful" sentiment (straight this time) on a piece of woodgrain cardstock and stitched over it in gold thread.  I then layered the floral images up with foam tape and added the "for you" on top.  Some Pretty Pink Posh gold sequins finished it up.


I think I finished this card at 1:30 a.m., but this is one of the only cards I have ever started and finished in one evening!  It holds a special place in my heart.  Yesterday, we celebrated our first Thanksgiving without my dad.  We congregated at my mom's home and despite the fact that his absence was palpable, we have so much we found ourselves grateful for.  We spent time together, ate a delicious dinner, and laughed and reminisced about old memories.  And I gave this card to my mom... she was the most perfect recipient.

I hope you enjoyed this project as much as I loved creating it.  Links to the products I used are below.    I participate in the Scrapbook.com affiliate program, which means that I receive a small commission at no cost to you when products are purchased through the links I share.  Thank you so much for your support!


Monday, November 19, 2018

Holiday Treat Bags with My Favorite Things Die-Namics Fold-Up Tags


Hello, crafty friends!  I am in the full holiday crafting swing of things, trying to avoid the last minute rush of making cards and gifts.  My Favorite Things has released a new Fold-Up Tags Die-Namics set that is perfect for embellishing holiday gifts.  I'm always looking out for projects that my daughter will not only like to make with me, but that she'll also enjoy giving to her friends and teachers.  These tags were the perfect embellishments to fun holiday gift and treat bags that we made with our favorite My Favorite Things holiday stamps and dies.


I fell in love with MFT's Festive Flamingos stamp set as soon as I saw it.  For my first project, I wanted to experiment with coloring stamped images on linen treat bags and to my delight, this was such a fun and easy process.  I first stamped my flamingos and my sentiment on the linen bag with black dye ink (I highly recommend using a stamp positioning tool like the Misti because I stamped the images a few times to get a nice dark impression).  I then painted in the images using non-toxic acrylic craft paint (perfect for crafting with kids).  To make the bag even cuter, I made some pom poms with coordinating yarn and affixed them to the bag with some small stitches.  To make the folded gift tag, I die cut the underlying layer with aqua glitter cardstock and embellished it with MFT's Layered Snowflake die cuts.  I stamped the tag's sentiment on vellum and embossed it in fuchsia embossing powder.  I then layered the tags together and finished them with some white glitter cardstock and a little glass ball I found at my local craft store.


For my second project, I stamped snowflakes from MFT's Trio of Trees stamp set and my sentiment from the Festive Flamingos set onto my bag.  I then cut my mug from MFT's Hot Cocoa Cup Die-Namics from wool felt, adding some stitching and sequins.  I adhered the die cuts onto the bag with craft glue and embellished the bag with more handmade pom poms.  To make my tag, I die cut the "Happy from MFT's "Happy Christmas" Die-Namics and embellished the tag with more stamped and die cut snowflakes.  I finished the tag with a die cut from MFT's Candy Land Paper pack.


For my third project, I first painted snowflakes on my linen bag by die cutting various snowflakes from MFT's Layered Snowflakes Die-Namics out of stamp masking paper.  I then used the negative die cut as a stencil and painted in the snowflakes using white acrylic craft paint.  I stamped the "Jingle All the Way" sentiment on white muslin using MFT's Sassy Pants Holiday stamp set and affixed it to the bag using craft glue.  I also added a row of pom pom trim along the top edge of the bag.  After treating my wool felt with Alene's Stiffen Quik to add stability to the delicate die cuts, I cut my "Happy Christmas" sentiment out of a rainbow of wool felt colors and affixed them to the bag using craft glue.  I again cut a tag from the Fold-Up Tags and an additional small tag from MFT's Stitched Tiny Tags Die-Namics, adding some stitching around the edge.  After affixing the tags, a little glass ornament, and some colorful sequins to the bag, this project was finished!


Links to the products mentioned here are below.  I participate in the My Favorite Things affiliate program, which means that I receive a small commission at no cost to you when products are purchased through the links I share.  Thank you so much for your support!

The sky is the limit for a fun crafty project like this - it is perfect for kids and there are so many fun ways to embellish the bags.  I hope you enjoyed these projects - I had a blast making them!Have you made any fun crafty holiday projects?  I'd love to hear about or see them!  I hope your holiday crafting is off to a fun and productive start!


Friday, November 16, 2018

Cross Stitched Shaker Card: My Favorite Things Snowflake Window Die


What is it about holiday cards that makes me want to make so many shaker cards?  I'm not sure, but I know that I LOVE a good sparkly shaker card when making my Christmas cards.  When I saw My Favorite Things's new Snowflake Window die, I immediately thought about a shaker.  I was also inspired by some pretty patterns from MFT's new Petite Plaid paper pack, and thought it would be fun to stitch up a wintery cross-stitched shaker card.

I started by creating a cross-stitched panel using my favorite Cross Stitch Bookmark die, running the panel through twice to cover the panel (you could also use MFT's Cross Stitch Rectangle as well).  I then cut a rectangle out of the center using the Snowflake Window die.  After choosing some pretty wintery threads and stitching up a plaid pattern (adding some sequins here and there), I layered some acetate in the window, sprinkled in some sequins, and adhered it to a white glitter cardstock base.  I then adhered the snowflake window on top of the acetate.  I cut the sentiment from MFT's new Ready, Set Snow stamp set, embossing it in white.


This snowflake window has so many possibilities, and I love how it finished off this shaker card so beautifully.


I hope you enjoyed this project!  Links to the products mentioned here are below.  I participate in the My Favorite Things affiliate program, which means that I receive a small commission at no cost to you when products are purchased through the links I share.  Thank you so much for your support!


Wednesday, November 14, 2018

Advent Calendar Awesomeness: Spellbinders Large Die for November


Holy cow, this is ONE FUN DIE SET!!!  When Spellbinders sent me their Large Die of the Month for November, I had no idea I was going to end up loving it as much as I do.  These dies are just so much fun and make the cutest holiday projects.


The Large Die Kit of the Month for November comes with everything you need to make not only an advent calendar, but holiday cards and treat/gift boxes.  And in typical Spellbinders fashion, the dies cut and emboss beautifully.  I started by cutting and assembling little gift boxes to make an advent calendar for my kids.  They are filled with little treats and fun messages like "You pick the movie for family movie night!"  The little tags and numbers are all included in the kit.  They are going to have a blast opening their boxes every day!  I'm also thinking these would be ADORABLE strung together to make a garland advent calendar, or even hung on the tree as little surprise ornaments.  They are so versatile!


I then made my extra large tree gift box with the dies also included in the kit.  I am using it as the last box for my advent calendar, but wouldn't these look so cute lined up in a holiday display or used as treat placecards for a holiday table?


I also decided to use the larger tree dies to make a shaker holiday card.  This card came together so quickly using coordinating patterned papers and white glitter cardstock.  I simply cut multiple layers of the middle tree, stacking them up to create height.  I added some acetate and sequins inside for a fun shaker.

I had so much fun using these dies that I want to make another set for a teacher friend of mine for use in her classroom.  This is the PERFECT project to make when you're binge watching your favorite TV show... not that I know that from personal experience, of course!  ðŸ˜‰


I hope you enjoyed these projects as much as I loved making them!  Links to the products I used are below.  I participate in the Spellbinders affiliate program, which means that I receive a small commission at no additional cost to you when products are purchased through the links I share.  Thank you for your support, and enjoy your holiday crafting!


Tuesday, November 13, 2018

Stitched Shaker Card: My Favorite Things Christmas Tree Window


If I had to name one favorite technique in card making other than stitching, I'd have to say it is die cutting.  I probably consider myself more of a die cutter than a stamper.  When My Favorite Things surprised me and sent me some of their products from their amazing November release (talk about happy mail!), I was thrilled to see their new Christmas Tree Window.  I immediately knew I wanted to make a shaker card, and I was thrilled when I went through my MFT stash and found that so many of their tree stamps and dies went so well with the Christmas Tree Window die.  So... why not combine stamping, die cutting, and stitching to make a little rainbow-y woodland of trees?

In choosing my colors, I was heavily inspired by a rainbow stripe patterned paper from MFT's Candy Land paper pad.  I first die cut the Christmas tree window in the center of my card panel cut from MFT's Die-Namics Stitched Rectangle STAX.  I did some subtle ink blending in pool-colored ink on the background, then chose vibrant hues of candy cane red, pink, lime and teal inks to both stamp trees from MFT's Trio of Trees stamp set and die cut trees from MFT's Winter Trees die set.  After adding stitching around the stitched die cuts in coordinating shades of thread, I layered my trees for dimension and interest.


All there was left to do was add some foam tape on the back of the panel, sprinkle in my sequins, and layer the panel on top of a piece of white glitter cardstock.  Before mounting the panel on top of my card base, I added a strip of that holiday rainbow paper from MFT's Candy Land paper pad that inspired the color scheme for this card.  I just love this little forest of stitched colorful trees!  I am not usually one to make duplicates of cards, but I adore this one so much and it came together so easily that I will be making more for sure!


I hope you enjoyed this project as much as I enjoyed making it!  The MFT Christmas Tree Window is currently FREE with a $60 purchase at My Favorite Things!  Links to the products mentioned here are below.  I participate in the My Favorite Things affiliate program, which means that I receive a small commission at no cost to you when products are purchased through the links I share.  Thank you so much for your support!


Embellishments with Scrapbook.com's North Pole Numbers for December Days


Don't you love sets that you can use across different kinds of projects!  When Scrapbook.com sent me their new North Pole Numbers for December Days stamp set, I envisioned so many paper crafting projects I could use this set for.  December Days scrapbook pages (of course!) and advent calendars were the first projects I thought of.  I'm imagining a bunch of little envelopes made with the We R Memory Keepers Envelope Punch Board and different patterned papers, each with a little number and a treat or coupon inside for the kids... I can't wait to make this!


Since I am currently knee-deep in holiday card and tag making, however, I also wanted to think of ways I could use this set to embellish my card projects.  And do they ever make the sweetest embellishments!  I first set out to make a tag featuring some of my favorite Scrapbook.com products. I cut a rectangle out with a stitched rectangle die, snipping off two corners to make a tag shape.  After adding some quick gold stitching around the edges, I stamped my Joy to the World sentiment from Scrapbook.com's Holly Jolly Sentiments stamp set, embossing it with red embossing powder.  I added some die cuts from Sizzix's Funky Festive Florals and Festive Greens die sets.  I then created a small circle accent tag with the antlers from the North Pole Numbers set, stamping the Dec 25 in the center from Scrapbook.com's Merry Mail set.  I attached this circle with a small jump ring to make an easy but really special tag.


For my card, I die cut a panel in the center of an A2 kraft cardstock card base with my Paper Smooches cross stitch die.  I did some quick stitching in a black and white buffalo plans pattern and embellished the panel with the Joy sentiment from Concord & 9th's Joyful die set.  I then stamped another circle using my December Days as a center embellishment for the wreath, hanging it with some gold thread. This little embellishment swings back and forth when the card is moved, creating a fun accent.  After adding some quick stitched lines and some fun colorful sequins, this card was finished!


One of my favorite things to do is stretch my supplies to see how many uses I can think of.  The December Days sets is one of those fundamental sets that can be used for so many different projects - I am so happy to have it in my stash!

I hope you enjoyed these projects!  Links to the products mentioned here are below.  I participate in the Scrapbook.com affiliate program, which means that I receive a small commission at no cost to you when products are purchased through the links I share.  Thank you so much for your support!


Tuesday, November 6, 2018

Christmas Shaker Postcard: Scrapbook.com Merry Mail


I am a sucker for holiday stamp sets, so when Scrapbook.com asked me if I would like to create a project with some of their new photopolymer holiday stamps I jumped at the chance.  I was so happy to receive their new Merry Mail stamp set - look at these little illustrated stamps!  Scrapbook.com's stamps are a premium clear photopolymer and a collaborative team effort of stampers and paper crafters' hand-drawn designs.  They stamp beautifully right out of the package.  These little holiday postage stamp images are obviously perfect for adorning holiday envelopes, but I thought it would be so much fun to make a card featuring these adorable illustrations.

I first stamped my stamp outlines using my favorite Scrapbook.com Hybrid Inks and then stamped the interior images using Scrapbook.com's hybrid black ink.  I colored the images using Copic markers, keeping the coloring simple but colorful and vibrant.  I adhered the little stamps to a premade Neenah Solar White Card Base (did you know that Scrapbook.com offers precut Neenah card bases, folded cards and envelopes?  What a time saver!) and stamped my sentiments from the Merry Mail and Scrapbook.com's Holly Jolly Sentiments set.  I also stamped little reindeer, gingerbread man, and snowflake accent images from the Holly Jolly set to fill in some white space.


I then cut a postage stamp border, cut out a window from the middle, and added some stitching around the edge for interest.  I adhered in some clear acetate with Scrapbook.com's double-sided adhesive and added foam adhesive around the edge.  I then sprinkled some clear sequins over my card base and adhered the frame on top.  And voila... a sweet holiday shaker card!  Of course, I couldn't stop myself from coloring another stamp and making a coordinating envelope... how could I not?  ðŸ˜‰


I hope you enjoyed this project as much as I enjoyed making it!  Links to the products mentioned here are below.  I participate in the Scrapbook.com affiliate program, which means that I receive a small commission at no cost to you when products are purchased through the links I share.  Thank you so much for your support!


Altenew Build-A-Flower Daffodil Giveaway Winner!


Thank you to everyone who stopped by for Altenew's Build-A-Flower Daffodil blog hop!  I appreciated each and every comment and I'm so thrilled you all stopped by.  Using a random number generator, the winner of the $20 Altenew gift card is:

Congratulations, Dawn!  Please contact Altenew at winner@altenew.com by 11/15/2018 with the subject line Altenew Build-A-Flower Daffodil Blog Hop Winner from Leigh Houston's Stitches in Paper Blog.

I hope to see you all again for the next release soon! Have a GREAT day!!! xoxo

Friday, November 2, 2018

Snowy Colored Pencil Sentiment: Spellbinders & Fun Stampers Journey


Happy Friday, friends!  Spellbinders made an exciting announcement yesterday... they have teamed with Fun Stampers Journey and you can now shop products from both companies in one place.  Both companies offer such unique and high-quality products, and it's so exciting to see this collaboration!

I was thrilled to be able to create a project with the Most Wonderful stamp set and the Branch and Cone die set from Fun Stampers Journey to create a festive holiday card.  I started by stamping my sentiment (and wow, did this stamp beautifully!) in a light-colored ink and added some subtle ink blending around the perimeter.  I also stamped some of the little foliage and floral accents amidst the lettering.  I then colored the images with colored pencils.  I used three shades of red and pink on the letters to create an ombre effect.  Wanting to make the sentiment even more fun, I added white gel pen and glitter glue on top of top of the letters to create a snowy effect.


After adding stitched accents to some of the foliage, I started die cutting my pine branch border.  I cut the branches out of white cardstock and colored them with different shades of Copic markers.  After adhering the branches around the perimeter of my card, I added some more white gel pen and glitter glue accents.  I wish photography could capture the sparkle of this card!


I had so much fun creating this project and was so impressed with the quality of the Fun Stampers Journey products.  I LOVE those green dies!  You can find the products in this exciting partnership is here.

I hope you enjoyed this project!  Links to the products I used are below.  I participate in the Spellbinders affiliate program, which means that I receive a small commission at no additional cost to you when products are purchased through the links I share.  Thank you for your support, and I hope you enjoyed this project!  


Custom Post Signature

Custom Post Signature