Monday, August 10, 2020

Spellbinders Die Cut Floral Card: Enhancing Die Cuts with Wonderland StoryTime Paint Pens


Hello again, friends!  I'm super excited to be back with another Spellbinders card.  If you're familiar with my cards, you know I am a super fan of die cutting.  I also love using different techniques to embellish my die cuts.  So when Spellbinders asked me if I would like to try the Wonderland StoryTime Paint pens, I jumped at the opportunity!  

I started this card by die cutting my florals from my favorite Spellbinders dies and kits.  I then used the finer tip paint pens to add painterly details to the little die cuts.  I loved the opacity of the pens, and although the nib was a bit thick to use on the tiniest die cuts, I was able to achieve fine lines by using very little pressure on the pen.  Using paint pens to embellish die cuts is one of my favorite ways to give them interesting dimension... I love how you can layer different colors and even use lighter pens on top of dark cardstock!  


After adhering my die cuts to my card base, I then added little painted dots using the teal-colored pen.  I just love how this card came out!  


Spellbinders is giving these pens away for free with a $75 purchase!  Be sure to head over to https://www.spellbinderspaperarts.com/ to claim yours!  

Thanks so much for stopping by today!  I'll see you soon with more cardmaking projects! 

Spellbinders Layered Glimmer Collection Card: Glimmered Botanicals and Geometric Florals


Be still, my die cut cut-loving heart!  Have you seen the Layered Glimmer Collection from Spellbinders? If you’re a fan of sparkly florals like I am, these are a must-have for your glimmer and die cutting collection. 

I created this card using Spellbinders’s Glimmered Botanicals and Geometric Florals Glimmer Hot Foil Plate & Die Sets.  These sets make it so easy to create gorgeous floral cards because Spellbinders has done all the hard work with creating these gorgeous layered floral shapes.  All there is to do is pick your color palette and start foiling!  I chose a palette of peaches, pinks, corals, and yellows for my main flowers.  I used gold Glimmer hot foil and glimmered my base pieces first.  I then die cut the other layered pieces and adhered them on top using liquid adhesive. 


I had originally planned on having a white base layer for this card, but after arranging my florals I decided that gray would give them more of a “pop.”  I selected a medium gray base and splattered it with white paint.  I then hot foiled my sentiment using the Elegant Twist Borders & Sentiments set.  After that, all there was to do was arrange my florals on top.  I added a few pool-colored gems for just a little bit more sparkle. 


This card is GORGEOUS in real life... I wish photography captured the beautiful shine of these florals.  These sets are truly a must-add to your Glimmer collection!  Links to the products I used are below.  I participate in the Spellbinders affiliate program, which means that I receive a small commission at no cost to you when products are purchased through the links I share.  I truly appreciate your support! 

I’ll see you soon with another Spellbinders project... I’ve been doing a lot of die cutting lately!  Thanks so much for stopping by! 

https://ldli.co/e/yz30dp

Thursday, August 6, 2020

Mod Stitched Card Using Simon Says Stamp's Spring Flowers Background Stamp


Hello, crafty friends!  I am so excited you stopped by today.  Simon Says Stamp has launched its new Let's Connect release, and I had the pleasure of creating this card with the amazing new Spring Flowers Background Stamp.  This just may be my favorite background stamp of all time.  I absolutely LOVE this stamp!  


When I saw this stamp, it reminded me of mod prints I recalled from back in the 70s.  I knew that stitching would add tons of texture and enhance that mod look.  I started by stamping my image and adhering my thank you sentiment in the center of the card (this is so I would not stitch underneath the sentiment, which can make the card bulky and the sentiment more tricky to attach).  I colored my flowers with alcohol markers using mauve-y pink and yellow tones and filling in the background with a pretty spring green.  After that came the stitching.  I simply used a paper piercer to poke holes along the stamp lines.  A tip:  when going around curves like the ones on these florals, you want to err on the side of piercing your holes closer together.  This avoids the curves looking jagged.  


After poking the holes, I stitched the holes using a simple backstitch.  I chose 4 strands of embroidery floss to achieve a chunkier look.  I love the effect of the stitching... it looks a bit like no-line coloring since it covers the stamp lines, and the texture it adds in real life is amazing.  This card feels soft to the touch.  I think there is something so special about this touch... the recipient of the card will be able to feel how much love went into making it!  

I finished my card by adding some more layers to this perfect thank you sentiment from CZ Design and adding some Nuvo Crystal Glaze on top for shine.  I then added some lemon yellow gems from Lucy's Cards to some of the flower centers for some sparkle.  

I hope you enjoyed this project as much as I loved creating it!  I am making another using some different colors because I love this stamp SO MUCH.  It has earned its rightful place in my list of favorite stamps ever!  


Thanks again for stopping by today, and enjoy the release!  


Thursday, July 30, 2020

Stitched Floral Card: Spellbinders Beautiful Ride Glimmer Plate


Hello, crafty friends!  If you can't tell by this card, I've been in the mood to #craftallthethings lately.  I've felt like stitching, coloring, diecutting, beading, and foiling... and thus, this card was born!  I am so in love with the way that my favorite stitching techniques came together with the Glimmer hot foiling on this card.  I see many more of these in my future!

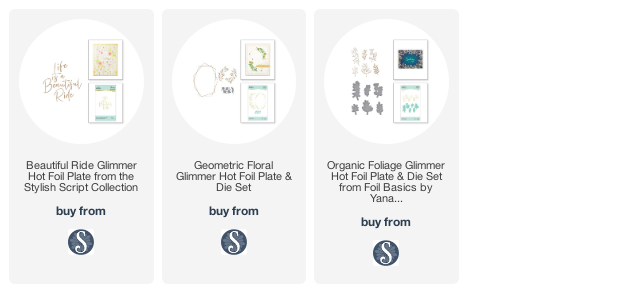
To start my card, I selected some very light gray cardstock and Glimmer foil in Champagne.  I used my Glimmer Hot Foil System to foil the gorgeous "Beautiful Ride" sentiment and center geometric from the Geometric Floral Glimmer Hot Foil Plate and Die set.  I then used the Organic Foliage Hot Foil set to foil some foliage in the corners.  I then die cut some florals from some favorite Spellbinders die sets and colored them using alcohol markers (tip: layer several shades in simple flicking motions to achieve depth and dimension to your flowers and foliage).


Once my coloring was done, I arranged my die cut flowers onto my card to figure out where I could add some stitching.  I added some simple roses and french knots here and there... enough to add some more texture and dimension to the card.  And as if this wasn't all enough, I decided to do some beading and add some small floral sequins, adhering them with yellow center beads.  A few small gold sequins and I called it a day... it was definitely way too tempting to keep adding embellishments!

I love how cardmaking allows us to create in so many different mediums, and this card is the embodiment of so many techniques that I love.  I hope you enjoyed this project as much as I loved creating it!


Links to the products I used are below.  I participate in the Spellbinders affiliate program, which means that I receive a small commission at no cost to you when products are purchased through the links I share.  I truly appreciate your support!

Thank you so much for stopping by today!  I'll see you again soon with another Spellbinders project.  In the meantime, stay safe and healthy!

Custom Post Signature

Custom Post Signature