Friday, May 7, 2021

Spellbinders Birdhouses Through the Seasons


Hello, crafty friends!  I am thrilled to be here today with this die cut card featuring Spellbinders's gorgeous new Birdhouses Through the Seasons dies.  These beautiful dies made putting this card together so easy and fun! 


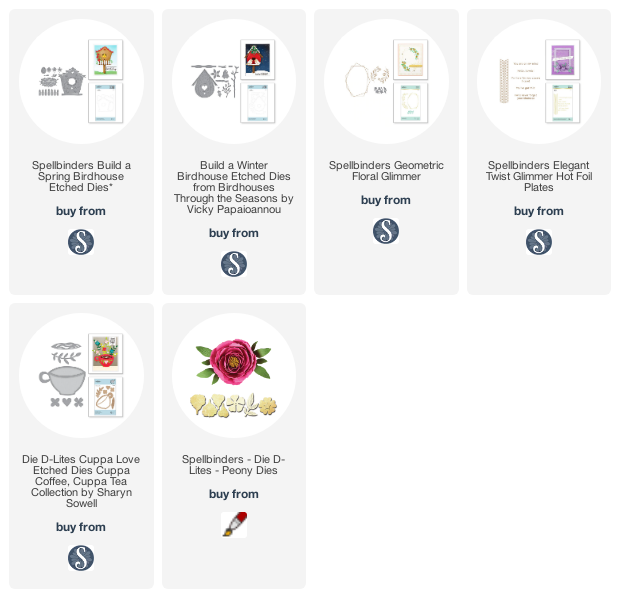
I chose to make my card in shades of blue with pops of pink.  For my birdhouse, I started with the Fall set, diecutting the house from a cornflower blue cardstock.  I embossed the image using my Spellbinders Platinum diecutting machine and the included embossing mat to make sure the card highlighted all the beautiful texture of the die.  I added some quick handstitching along the vines to make them pop.  I then diecut a bunch of florals and foliage using the Fall and Winter birdhouse sets, along with some of my other favorite Spellbinders dies. 


Before adhering my florals and foliage to a dark indigo cardstock base, I used my Spellbinders Glimmer system to foil my sentiment in the lower corner using silver foil and the Elegant Twist Glimmer Borders and Sentiments set.  To finish the card, I used a white gel pen to add dots and accents to my flowers and foliage for some added interest.


I loved making this project and I hope you enjoyed it, too!  Links to the products I used are below.  I am a member of the Spellbinders affiliate program, which means that I receive a small commission at no additional cost to you when products are purchased through the links I share.  I truly appreciate your support! 


Thanks so much for stopping by today, and I'll see you again soon with another cardmaking project! 


Wednesday, February 24, 2021

Gouache + Stitched Background: Simon Says Stamp's Botanical Split Background Cling Stamp


I feel as though background stamps are under-appreciated.  Or maybe that's just me.  I admired them from afar on other people's projects, but I was never sure if I wanted to make the investment in one.  But I now see how not only can background stamps enhance other striking focal point images, they can stand alone and shine in their own right.  This gorgeous new Botanical Split Background stamp from Simon Says Stamp is such a beauty and quickly earned its place as one of my favorite stamps.  


This ingenious stamp splits into three wavy shapes, allowing you to easily stamp the segments in different colors to achieve gradients or bold color changes on your projects.  I decided to keep mine together and make it shine on its own.  I stamped my image in light gray ink (Simon Says Stamp Fog ink is perfect) on light pink cardstock.  I then brought out my gouache paints and did some quick, simple painting over the stamped images.  Acrylic paint would also work beautifully for this.  This took me about an hour and was like doing a paint-by-number.  So relaxing! 


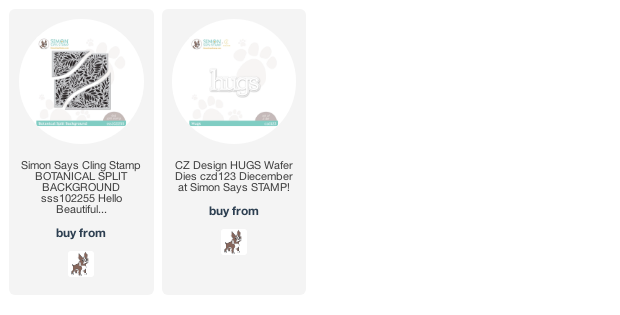
I die cut the CZ Design Hugs sentiment three times from 110# white cardstock, layered them together with liquid adhesive for dimension, and adhered the stacked sentiment to my card.  If you're familiar with my projects, you know that I love adding stitching for extra texture, interest, and handmade detail.  The little dots on the stamp were the perfect excuse to do some french knots.  I pulled out some white embroidery floss and got to knotting.  This process was, again, very methodical and relaxing.  Some little floral sequins with dots of Nuvo Drops finished this card.  


I may add a sentiment strip later when I know who the recipient of this card will be, but I love this card just as is.  I just love this background stamp, and I hope this project inspired you to give some pretty background stamps their moment in the sun.  :) 


Links to the products I used are below.  Thanks so much for stopping by today and I'll see you again soon!


Friday, February 19, 2021

Papertrey Ink's Ink to Paper Effortless Beauties and Feathered Friends 8: Soft Stamped Floral Card


Every once in a while, a stamp set comes along that you instantaneously fall in love with.  The new Effortless Beauties stamp set from Ink to Paper is just that for me.  It pairs so beautifully with the new Feathered Friends 8 dies that I couldn't wait to make this card project! 


I started this project by stamping my floral images.  I knew I wanted to achieve a soft, earthy color scheme, so I pulled out my Distress Oxide Inks and my much-ignored pigment inks so I could achieve soft color blends.  I used sponge daubers to pounce my colors onto my stamps, which allowed me to mix colors and achieve subtle blends.  I used these same colors to blend the die cuts of the sweet little bird before assembly. 


Before adhering my images, I ink blended some Speckled Egg Distress Oxide Ink onto a white cardstock base and onto a circle I die cut using the Love to Layer: Scalloped Circles dies.  I stamped my sentiment in the corner, arranged my florals around the circle in a loose configuration, and added a branch from the Tag Creations: Blooming Indulgence die set.  I decided I wanted my bird to have some dimension, so I die cut 3 more base layers and adhered them all together to create a thicker bird shape.  I adhered the bird into the center of the florals and added some gold watercolor splatters to finish this card. 


These floral images are so beautiful that I have two more projects planned, which I am currently chomping at the bit to make!  Links to the products I used are above.  I'll be back soon with these additional projects and I hope you'll stop by again to check them out.  Thanks so much for hanging with me through this amazing new release from Ink to Paper, and I hope you found some inspiration to create some fun new projects of your own!  


Papertrey Ink's Ink to Paper She Blooms Stamps and Dies: Creating a Feminine Floral Tulle Shaker Card


What a lovely new image from Ink to Paper!  Isn't this woman in her flowing floral dress just gorgeous?  This image was the inspiration for this feminine tulle shaker card, and I'm excited to share the process with you today! 


I was inspired by a piece of pretty patterned paper in selecting the colors of my card.  I stamped my main image onto white 110# cardstock, coloring it in with Copic markers in hues complimentary to the patterned paper.  After die cutting it with the coordinating dies, I created my base panel.  I created a panel by die cutting a white panel with the Cover Plate: Ornate die, affixing it to an 80# cardstock base.  I die cut an oval into this panel using the Geometrix: Oval dies then set about making my shaker panel.  I first attached a layer of tulle behind the window using double sided tape.  I sprinkled some white and iridescent confetti onto the tulle, and affixed another layer on top using more double sided adhesive to make sure it was extra secure.  I then used foam tape to pop this panel up, affixing it over my piece of floral patterned paper.  The confetti glides to effortlessly between the tulle layers... I just love these pretty, feminine shaker cards! 


All that was left to do was adhere my main image over the panel using liquid adhesive.  I stamped my sentiment onto a flag made from the same patterned paper and adhered it to the upper corner of my card.  


This is such an impactful image that creates the most beautiful cards.  I hope you enjoyed this project!  Links to the products I used are above.  I'll be back again today with one more project from this absolutely beautiful new release.  See you soon!  


Thursday, February 18, 2021

Papertrey Ink's Ink to Paper Cover Plate: Vines + Feathered Friends 8 Mini Stamp Set: Soft Inked Floral Card


How sweet is this little bird?  I can't get enough of these little Feathered Friends from Ink to Paper! 


I created this card by pairing the new Cover Plate: Vines (the perfect foliage backdrop to floral cards) with this cute little bird.  I die cut my Vines Cover Plate from white cardstock and adhered it to a panel of white cardstock to achieve a pretty tone-on-tone look.  I die cut the largest circle from the Love to Layer: Scalloped Circle dies and cut another smaller circle from the center, creating a circle frame.  I then used the same inner circle die to cut a circle from my foliage panel, creating a beautiful insert for my center focal circle frame.  After adhering this to the center of a white A2-sized cardstock panel, I stamped my bird using soft shades of Distress Oxide Inks, die cut it with the coordinating dies, and adhered it to the center of the circle. 


I then selected the Birthday Bouquet stamps and dies to create a pretty floral frame around my bird.  Again using Distress Oxide Inks, I stamped my images using sponge daubers to apply the colors to the stamps, allowing me to achieve soft blended looks.  I added some foliage from the Framing Florals stamps and dies, arranging all of my floral and foliage elements around the circle.  


I stamped my sentiments from the new effortless Beauties stamp set in the bottom corner and splattered my card with Peacock Feathers Distress Oxide Inks to finish this fun card project.  What fun this was to create!  Links to the products I used are above.  Thanks for stopping by and I'll be back soon with another cardmaking project from Ink to Paper's new release!  


Papertrey Ink's Ink to Paper Framed In Florals Stamps and Dies: Creating a Dimensional Die Cut Card


Oh, how I love coloring floral images!  This new, beautiful Framed In Florals stamp and die set from Ink to Paper is so perfect if you, too, love adding your own touches to floral images.  This was such a fun card to make! 


I started by stamping and die cutting my two floral images twice each onto white 110# cardstock.  I then used Copic markers to add quick, simple, but impactful coloring to these florals.  I really didn't spend any time worrying about blending my colors, using a simple flicking technique to color the florals and foliage.  Because I knew I was going to stack these images, I colored one image fully and colored just the edges of the second image, not wanting to waste time coloring  parts that would not be seen. I also traced around the white edges of my images with a gray Copic marker to better allow it to blend in with a gray cardstock background.


To assemble my card, I chose an A2-sized panel of Weathervane cardstock (a perfect gray!) and affixed my floral images.  I used foam tape to adhere one image on top of another, slightly offsetting the underlying image so it would peek out from underneath.  I used the To Die For Sentiments: Hello Beautiful to die cut my "Hello" image three times, stacking them together for dimension.  I stamped a few sprigs from the stamp set above and below my floral images, using a white paint pen to color the berries white.  I am of the firm belief that splatters make almost anything better, so some white splatters gave this card a finishing artistic touch.  


I just loved making this project, and I hope you enjoyed it as well!  I can't wait to go back and spend some more time coloring these flowers with colored pencils, which are my favorite coloring medium to create floral cards with.  Thanks so much for stopping by, and I'll see you again with another fun new project from Ink to Paper! 


Wednesday, February 17, 2021

Papertrey Ink's Ink to Paper Lush Blooms + Inside Greetings: Blooms Stamps and Dies: Creating a Simple, Elegant Floral Card


Who doesn't love a striking, elegant floral image?  The new Lush Blooms stamps and dies create just this, allowing you to make simple yet gorgeous floral cards quickly and easily.  Such a stamping staple product! 


I started my project by stamping the second and third layers of the gorgeous floral onto Sweet Blush cardstock (time saving tip: you can forgo stamping the large first base layer and stamp directly onto colored cardstock) using different shades of pink ink.  I then did the same thing for my leaves, stamping the second and third layers onto New Leaf cardstock using green ink.  So quick and easy! 


To create my panel, I die cut a layer using Dark Indigo cardstock using the Cover Plate: Trellis die, adhering it to a teal A2-sized cardstock base.  I then took another panel of Dark Indigo cardstock and die cut an oval using the Geometrix: Oval die in the center.  I popped up this layer with foam tape and adhered it onto the trellis base layer.  Before adhering my floral image, I stamped my sentiment from the Inside Greetings: Bloom mini stamp set onto vellum, heat embossing it in gold.  I wrapped this sentiment around my base panel and adhered my floral image on top.  A few gold sequins and this elegant card was finished! 


This was such a quick and easy card to make, yet it packs such a visual punch.  I hope you enjoyed it, and I'll see you again soon with more projects from the beautiful release from Ink to Paper! 


Papertrey Ink's Ink to Paper Pop-Up Envelope Dies and Pop-Up Florals: Making an Envelope Into a Card!


I love new and innovative products, and the new Pop-Up Envelope die and Pop-Up Florals stamps and dies are just that.  I have never considered making an envelope into a card itself, and these two products combined perfectly to create a dimensional envelope card.  So much fun! 


I started my project by die cutting my envelope with the new Pop-Up Envelope die using Sweet Blush cardstock.  I also added some accents to the flaps using Prairie Grass cardstock.  I used the included small circle die to cut a small circle on the envelope flap (this is how I would close the envelope using ribbon later).  I then die cut an A2-sized panel of Sweet Blush cardstock, trimming some off of the edges so it would fit inside the envelope and allow the flaps to close.  I then used the new Pop-Up Florals stamps and dies to create my floral scene.  I pulled out my stash of colored embossing powders (which I don't use nearly often enough) to stamp and emboss my florals onto white, Lovely Lady, and Aqua Mist cardstocks, using the coordinating dies to cut them out.  I then adhered some of the florals directly to the panel and used the included dies to pop up my aqua florals.  This allows these blooms to pop up as soon as the envelope is open.  So fun! 


I stamped my sentiment using the new Just Sentiments: Blooms mini stamp set onto the corner of my panel.  I then attached my panel to the inside of the envelope, making the envelope itself into a card.  A pretty piece of coordinating ribbon ties the envelope closed, concealing the pretty surprise inside.  What a fun interactive card! 


I hope you enjoyed this project!  These pop-up envelope cards are so much fun to make.  Links to the products I used are above.  I'll see you again today with another fun project from this month's release! 


Tuesday, February 16, 2021

Papertrey Ink's Ink to Paper Rainbow Arches and Tiny Blooms Stamps and Dies: Creating a Stitched Rainbow Card


Oh, how I love rainbows.  And flowers.  And foliage.  So it's as though someone tapped right into my creative side when designing the new Rainbow Arches dies along with the Tiny Blooms stamps and dies.  I had so much fun creating this flowery, leafy stitched rainbow and I'm here to share the process with you today! 


I started my project by die cutting my rainbow out of 110# white cardstock.  I cut the bottom off of the rainbow and decided to use every other arch within that rainbow, coloring each with a different colored Copic markers.  I also die cut my foliage from the Rainbow Arches dies and colored it with green Copics.  As I assembled my rainbow onto Soft Stone cardstock, I decided to add some simple white backstitching on the first arch and between the second and third arches.  I simply used a paper piercer and a mouse pad to punch holes into the cardstock as I assembled, adding backstitching thereafter.  After adhering my third and fourth arches, I added some stitched star shapes in between them (although these were largely covered by the foliage I added afterwards, so were I to make this card again, I'd likely forgo this stitching). 


After my rainbow was assembled and stitched, I stamped some sweet little blooms from the Tiny Blooms stamp set and die cut them with the coordinating dies.  After adhering my foliage and florals, I die cut the "Hello" from the To Die For: Hello Beautiful die (cutting off the "beautiful") three times, layering them with liquid adhesive for dimension.  I then stamped the "sunshine" from the Brighter Days stamp set, embossing it in white.  I added some more stitched star shapes around my rainbow and added some yellow flower sequins as my final touches.  I trimmed off about 1/4 inch from the perimeter of my card panel and mounted it on top of an A2-sized panel of Sweet Blush cardstock to finish this stitched card. 


I hope you enjoyed this project!  Links to the products I used are above.  I'll see you again tomorrow with two new projects from this beautiful new release! 


Papertrey Ink's Ink to Paper February 2021 Release: Sweet Hoppiness Stamps and Dies


Hello, friends!  I am so thrilled you're here joining me today for the countdown to Ink to Paper's February 2021 release!  I am kicking off the countdown with two projects I made with the new Sweet Hoppiness stamps and dies.  How cute is this little bunny? 


I started with the sweet little bunny favor box, which I thought would be perfect for a baby shower favor.  I used the In Stitches: Tote Bag dies, some pretty pink plaid patterned paper and some ribbon to construct my tote bag (for my tips and tricks on assembling these tote bags, see here).  I then used the small XO Heart Frames dies to cut two frames out of green cardstock.  I stamped my bunny onto 110# white cardstock and did some quick Copic coloring before assembling my image and frames on the front of my tote bag.  I then stamped an "Established 2021" from the Just Sentiments: Established stamp set onto a punched tag and tied it around the handle.  I accented my wreath and tag with some sweet stamped flowers and some gems and this cute little tote bag was finished. 


For my card project, I stamped my bunny onto a circle of white 110# cardstock, masked it off, and did some quick ink blending with Tumbled Glass Distress Oxide ink.  I then colored my bunny with Copic markers, added some colored pencil shading, and then for some fun texture and interest, added some quick simple stitches.  I stamped and die cut the wreath from the Wreath Favor Box Sentiments stamps and dies, as well as a large circle from the Delicate Doilies dies using Spring Rain cardstock.  I cut a strip of plaid patterned paper and adhered it down the center of an A2-sized card panel and added a white frame from the Border Bling: Skinny Heart Frames dies.  I then added my doily, wreath and bunny images to the center of the card, layering the top wreath layer with foam tape for dimension.  I then stamped my sentiment using the Brighter Days stamp set onto a die cut banner from the Banner Builder: Basics dies and layered it over my wreath using liquid adhesive and foam tape.  Some quick little stamped flowers and foliage from the Sweet Hoppiness stamp set and a few yellow gems sprinkled here and there finished this sweet card.  


I hope you enjoyed these projects!  Links to the products I used are included above.  I'll see you again soon with another project from this gorgeous, spring-inspired new release!  


Thursday, January 21, 2021

Ink to Paper's In Stitches: Tote Die - Assembly Tips and Tricks for Wool Felt Totes!


Hello, friends!  I am so happy to be here today sharing these two adorable tote bags made with the new In Stitches: Tote Bag die set from Ink to Paper!  I simply cannot stress enough how CUTE these little bags are.  And I also can't stop thinking about all the ways you can use them.  Not only are they perfect as packaging for gift cards and other small gifts, they would be absolutely perfect for baby showers, bridal showers, teacher gifts... oh, the possibilities!  


You can assemble these little totes with cardstock, but I thought they would be especially cute made with wool felt.  I started by die cutting all of my pieces from wool felt.  To add sturdiness and stability to the totes, I also die cut the front, back, and bottom pieces from 80# cardstock.  I trimmed a sliver off (approximately 1/8") of each side of these cardstock pieces and used a small amount of liquid adhesive to attach them to the coordinating wool felt pieces.  Note that I did not add cardstock to the sides of the totes; I wanted these to remain soft and pliable. 


Then came my favorite part: embellishing!  You can embellish with virtually anything you want.  For my first tote, I first added a simple chain stitch along both edges.  I then chose to XO Heart Frames die (die cut with two shades of green cardstock) and glued the embellishments to the center of the tote front with liquid adhesive.  I also added some sequins here and there and a tag I made with a sentiment from the Wreath Favor Box Sentiments stamp set (attached to the handle with a jump ring).


For my second tote, I die cut the To Die For Sentiments: Hello Beautiful sentiment from white cardstock and a pretty daisy from the Into the Blooms die set (adding a leaf from the Tag Creations: Blooming Indulgence die set).  I stitched on some sweet little leaves from the Tote Bag Accessories die and added some white daisy sequins here and there. 


I next attached the tote bag handles.  I used ribbon for my handles, which was pretty but too flimsy for the handles to stand up.  To remedy this, I used the handle die from the Tote Bag die set and die cut two strips of 80# cardstock.  I adhered these to the ribbon, which gave enough stability to keep the handles upright.  I then attached these to the insides of the front and back of the bags.  


To assemble the totes, I ran a thin bead of hot glue along the right inner edge of the front of the tote, adhering the side piece.  I then did the same thing again by running a bead of hot glue down the inside edge of the right side piece and adhering the back of the tote bag.  I followed the same process, next the bottom of the tote bag and then the final left side.  You may find it necessary to trim a bit of the bottom off the tote... I found that this made it easier to make all of the pieces flush.


Aren't these just the sweetest little totes?  I can't get enough of them.  I hope you enjoyed these projects; if you have any questions on how I assembled the bags, please drop me a comment and I'll be sure to get back to you.  Links to the products I used are above, and you can also find an incredible kit with felt and other accessories here.  Thanks so much for stopping by today and I'll see you again soon!  


Wednesday, January 20, 2021

Ink to Paper's Feathered Friends 7 Die


Hi!  It's so nice to see you again with another cardmaking project from Ink to Paper's January release!  This die cut card was made with the new Feathered Friends 7 dies.  I LOVE die cutting, and I had so much fun combining die cuts to make this floral card. 


I started by die cutting my largest circle from the new Delicate Doilies die set and one small circle from the Love to Layer: Scalloped Circles dies.  I stamped my sentiment from the Just Sentiments: Love stamp set, then adhered both circles to my card (I added foam tape to the small circle for added dimension.  I then die cut the bird from white cardstock and added color using Copic markers before adhering it to the larger circle.  To finish the card, I die cut florals and foliage from the Tag Creations: Blooming Indulgence die set to create little flower bunches here and there around the card (I added some gold foil cardstock into the flower layers and into the foliage for some added glimmer).  A few gold and white dots here and there finished this card! 


I hope you enjoyed this project!  Links to the products I used are above.  I have some more stitched products from this awesome new release coming to the blog... I hope to see you again soon!  


Ink to Paper Feathered Friends 7 Mini Stamp Set


Hi!  Thanks for stopping by today for this cardmaking project made with Ink to Paper's new Feathered Friends Mini 7 stamp set!  Isn't this such a sweet little hummingbird? 


I started my card by die cutting a banner with the In Stitches: Banner die, adding a simple chain stitch with white embroidery thread around the edge.  I then used the Cover Plate: Ornate die to emboss a white cardstock base and adhered my stitched banner on top.  I die cut my sentiment with the To Die For: Bright Days die three times, layering them on top of each other for dimension, and adhering it to the banner. 


To embellish my card, I stamped my hummingbird with the Feathered Friends 7 mini stamp set with Distress Oxide inks in different shades of blue.  I die cut a big, beautiful flower and two leaves using the Into the Blooms die set, ink blending Distress Oxide inks on tops.  Some white and black splatters for some artistic details finished this card! 


I hope you enjoyed this bright, colorful project!  Links to the products I used are above.  Thanks again for stopping by and I'll be back with more projects from Ink to Paper's January release! 


Tuesday, January 19, 2021

Ink to Paper's Just Sentiments: Established + Inside Greetings: Established Stamp Sets


Hello!  I'm thrilled you're back for this project made with the new Just Sentiments: Established  + Inside Greetings: Established stamp sets.  This was such a fun card to make! 


I started my project by blending different shades of brown and gray on a white cardstock panel then die cutting them with the Woodwork dies.  After adhering them to a cardstock panel, I die cut my "Love" sentiment with this die and adhered it onto my panel, popping it up with foam tape.  I then stamped my "Established" from the Just Sentiments: Established set onto a banner I die cut from the Banner Builder: Basics dies and stamped my "2000" in the bottom corner.  


All that was left were some pretty florals, which I stamped with the Framing Florals and Pleasing Envelopes: Special Delivery stamp sets.  I did some quick and simple Copic coloring and adhered them around my card.  Some white splatters and this card was finished! 


I hope you enjoyed this project!  Links to the products I used are above.  I'll see you again soon with another Ink to Paper cardmaking project!  


Ink to Paper's Just Sentiments: Milestones and Number Dies


Hello again!  I'm so happy you're here for this project featuring the new Just Sentiments: Milestones and Number dies from Ink to Paper!  These two new items pair perfectly together and were such fun to use in creating this card project! 


I started my project by die cutting a white panel with the Love to Layer: Notched dies.  I then stamped two wreaths from the Wreath Favor Box Sentiments stamps in two shades of green and cut them out with the coordinating dies, adhering them in the center of my panel.  After stamping some pink florals from the same stamp set and some additional foliage and berries from the Framing Florals: Christmas and Floral Christmas stamp sets, I die cut my "40" with the new Numbers dies using Classic Kraft cardstock, adhering together 3 layers for added dimension.  I stamped my sentiment from the Just Sentiments: Milestones stamp set below my wreath, adhered my numbers in the center of the wreath, and adhered the panel onto a Classic Kraft panel. 


This card was such a joy to make, and I hope you enjoyed it!  Links to the products I used are above.  Thanks again for stopping by and I'll be back with another project from the new January 2021 release! 


Monday, January 18, 2021

Ink to Paper's Big Balloons Stamps and Dies + Cover Plate: Big Balloon die


Hello, friends!  I'm so happy to be sharing this project from the new Ink to Paper January 2021 release.  This project features fun new balloon images, dies and stencils, and I'm excited to walk you through my process! 


I starts by cutting out a panel with the new Cover Plate: Big Balloon die five times.  For my top panel, I used fun gold-embossed patterned papers to inlay over three of the balloons.  I adhered a panel of vellum behind this top layer for some softness, then stacked the remaining four panels underneath using liquid adhesive.  I used a fun confetti die from the new Big Balloons dies to cut little confetti with gold mirror cardstock, sprinkling them inside the open balloons.  I adhered a panel of Aqua Mist cardstock behind the stacked die cuts to create a shaker card. 


I then die cut a balloon from the Big Balloon dies and ink blended it with Spun Sugar and Picked Raspberry Distress Ink.  I used a stencil from the Big Balloons stencil set to sponge on some Versamark Ink and heat set it with gold embossing powder.  I also used gold embossing powder for my balloon tassel and bow,  I then stamped my sentiment from the Big Balloons stamp set on the balloon and adhered it onto the shaker panel.  A quick splatter of gold watercolor finished the card beautifully! 


Thanks again for stopping by today!  Links to the products I used are above.  I'll see you again soon with another new Ink to Paper cardmaking project! 


Ink to Paper's Vintage Flair + Vintage Flair Print Stamps and Dies

 Hello!  Welcome back for day 3 of Ink to Paper's January Release countdown!  My two projects today features the new Vintage Flair and Vintage Flair Print stamps and dies.  These products are gorgeous and lend themselves to such different card designs.  I made one vintage-inspired card and one super modern card, and I'll walk you through the process of both! 


For my first card, I started by die cutting a white panel with the Border Bling: Grateful Vines die, stamping the pretty images from the Vintage Flair Print onto the center (masking off the edges), popping it up with foam tape, and adhering it a Classic Kraft cardstock panel.  I then die cut the pretty terrarium from the Vintage Flair die set 4 times.  I stamped the coordinating image and embossed it in gold for my top layer.  After adhering a sheet of acetate behind the first layer, I stacked the remaining 3 layers underneath, adhering them together with liquid adhesive. 


I then stamped my floral and accent images from the Vintage Flair stamps in black onto white cardstock and die cut them with the coordinating dies.  I added some quick sketchy Copic marker coloring to the flowers and butterfly. 


I sprinkled some white confetti and gold sequins onto my center panel before adhering the terrarium on top, making a shaker element.  I then adhered my florals and flourishes around my card, finishing everything with a few gold sequins. 


For my second project, I decided to take a more modern approach.  I stamped and die cut a gold terrarium using the same process as above.  I then die cut a white panel using the Cover Plate: Trellis die, die cut out the terrarium image, and adhered it onto a white cardstock base with liquid adhesive.  I then used the Tag Creations: Blooming Indulgence dies to die cut a bunch of pretty florals and foliage, using Copic markers to add color.  All there was left to do was arrange these pieces around the terrarium.  I stamped a simple sentiment from the Brighter Days stamp set and sprinkled a few sparkly gold sequins to finish my card. 


I hope you enjoyed these projects!  Links to the products I used are above.  I'll be back with another project using new products from Ink to Paper - see you soon!  


Custom Post Signature

Custom Post Signature